Running a small business can be tough, but keeping track of your finances doesn't have to be. Enter QuickBooks. Now, what is QuickBooks? How does it work? QuickBooks is best known for its bookkeeping software, it offers a range of accounting and finance solutions for small businesses. In this blog, we will walk you through setting up the QuickBooks.
What are QuickBooks?
QuickBooks offers a complete suite of accounting and finance solutions to make your life easier. From paying your employees with QuickBooks Payroll, to tracking your inventory and sales with QuickBooks Commerce, to keeping your books up-to-date with QuickBooks Online - QuickBooks has got you covered. With the ability to start with a single app and add others as your business grows, QuickBooks is the perfect solution for small and mid-sized businesses. Whether you need help from an expert bookkeeper with QuickBooks Live or want to streamline your payments with QuickBooks Payments, QuickBooks is your one-stop solution for all your accounting and finance needs. You can download and install the required QuickBooks software from the QuickBooks Intuit website.
Steps to set up QuickBooks
Now that you have decided to take the plunge and adopt QuickBooks for your business, see here how to set up the program, step by step in real world. Here, keySkillset platform uses simulation method to reflect the functions or steps to set up the program. See, here how that works.
Step 1: The first step is to navigate to the chart of accounts. How do we do this? Very easy, there is a shortcut to do this very quickly. In the screenshot below you can see the command.
Click on Ctrl + Alt + A
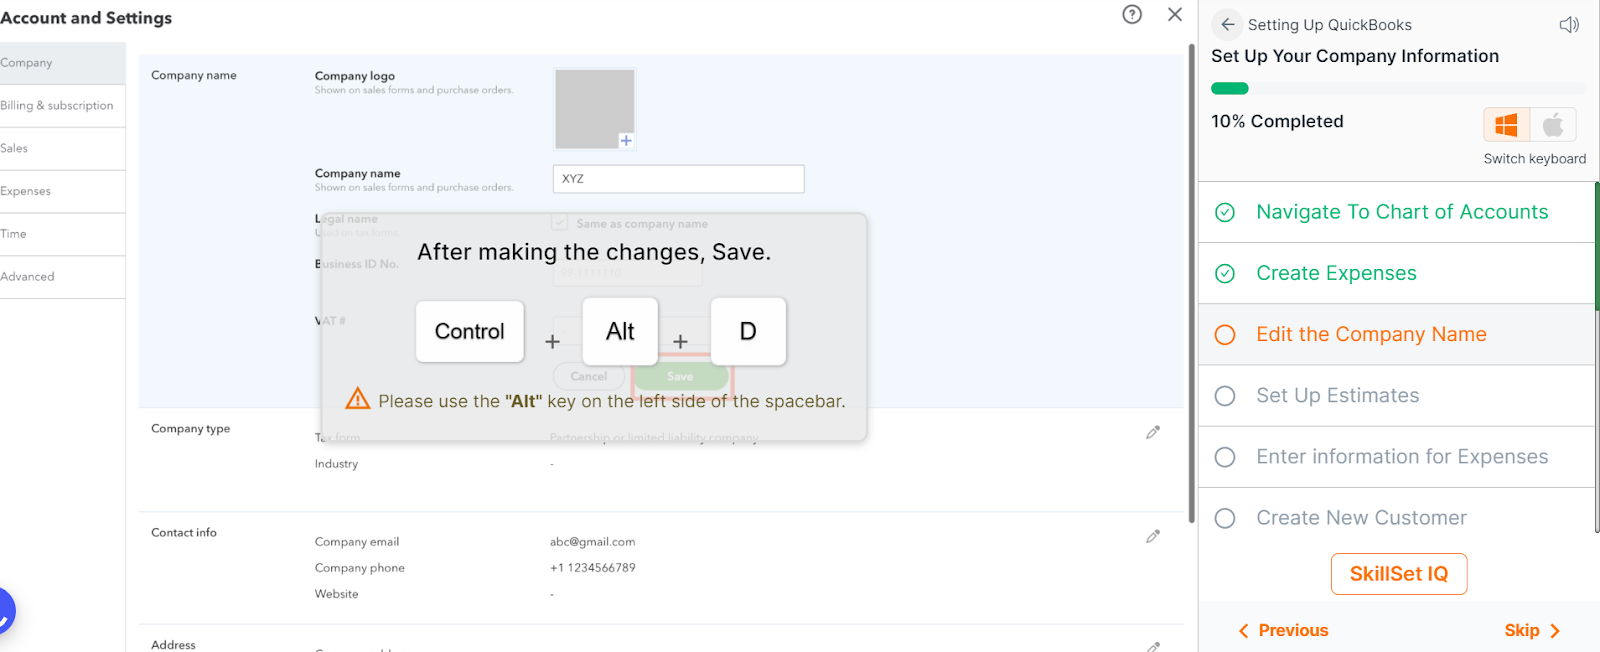
(In the screenshot below, it's clearly mentioned that we need to use the Alt key on the left side of the space bar on your keyboard)
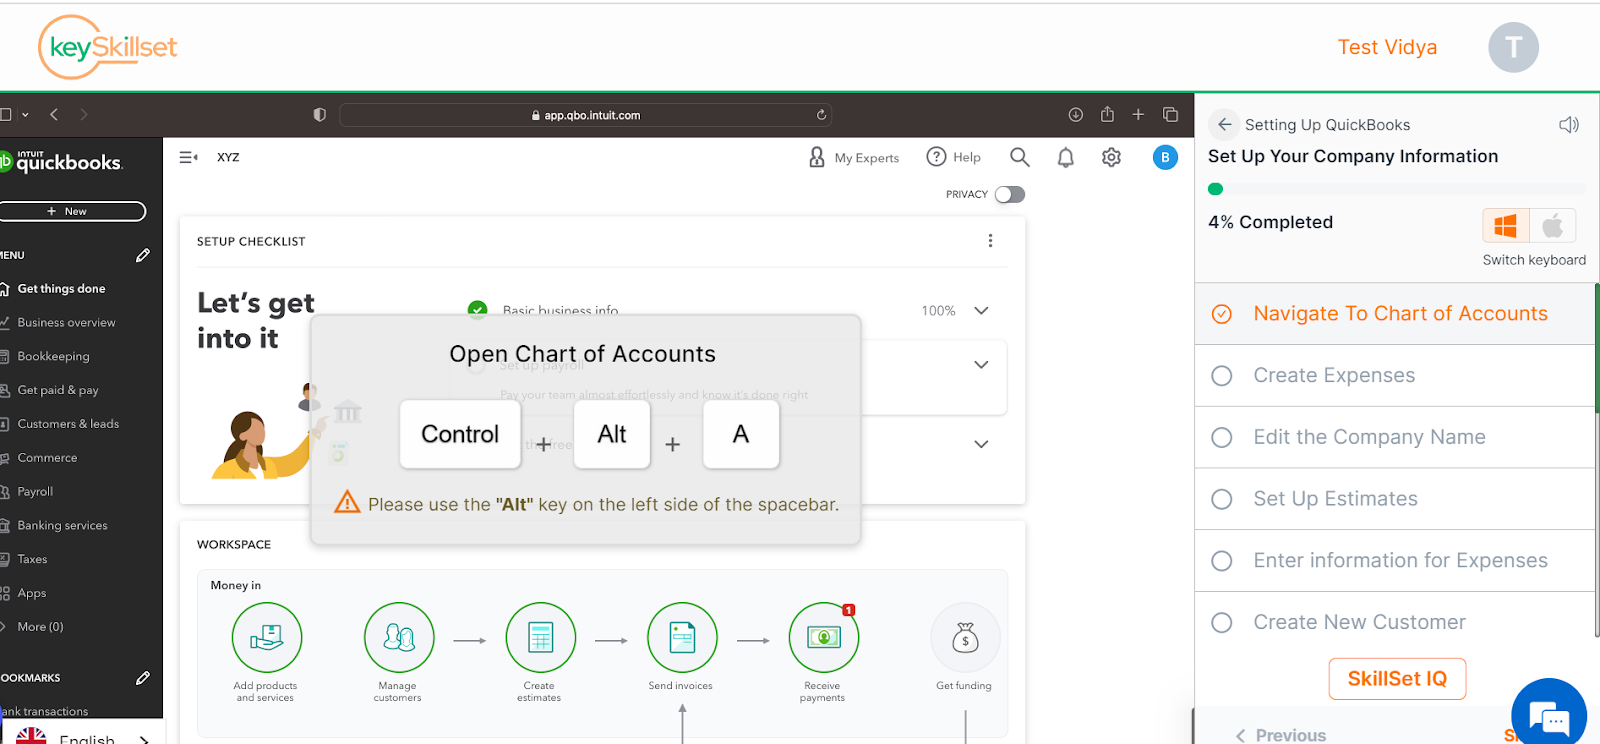
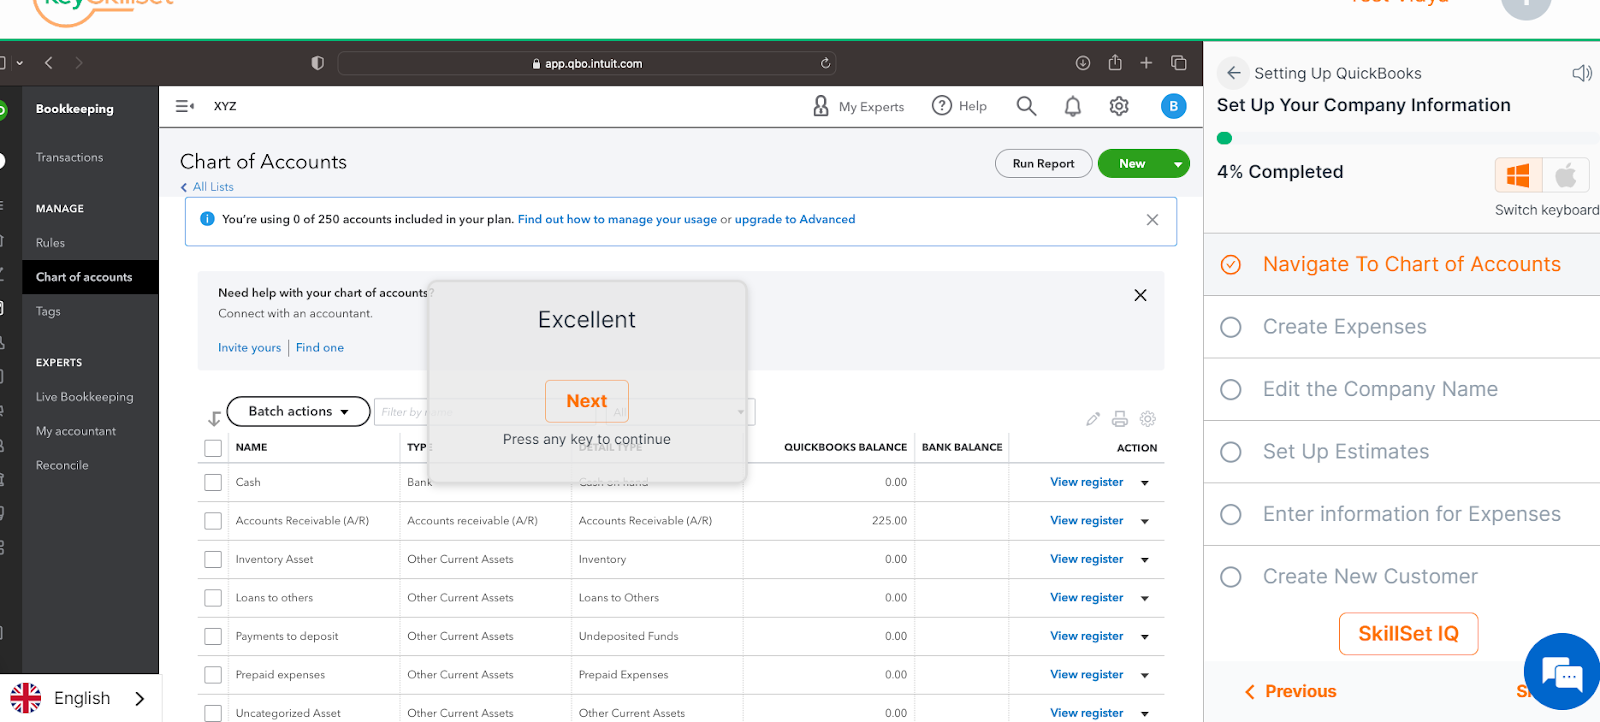
As you can see below, the chart of accounts opens up on clicking the commands given:
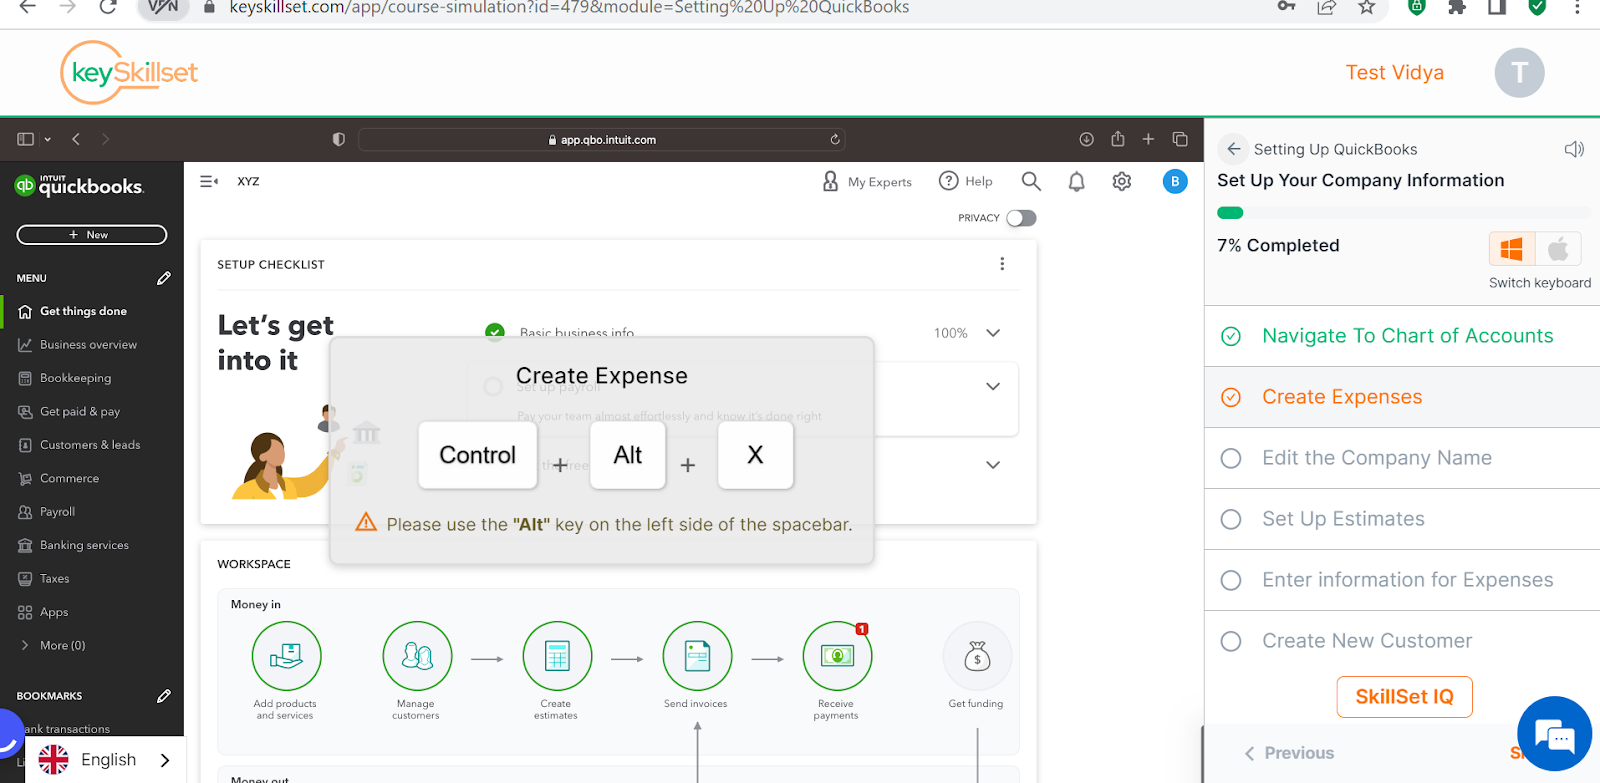
Step 2: Now, you will need to create the expense on QuickBooks. And the command prompt for this is Ctrl + Alt + X (as clearly indicated in the screenshot below)
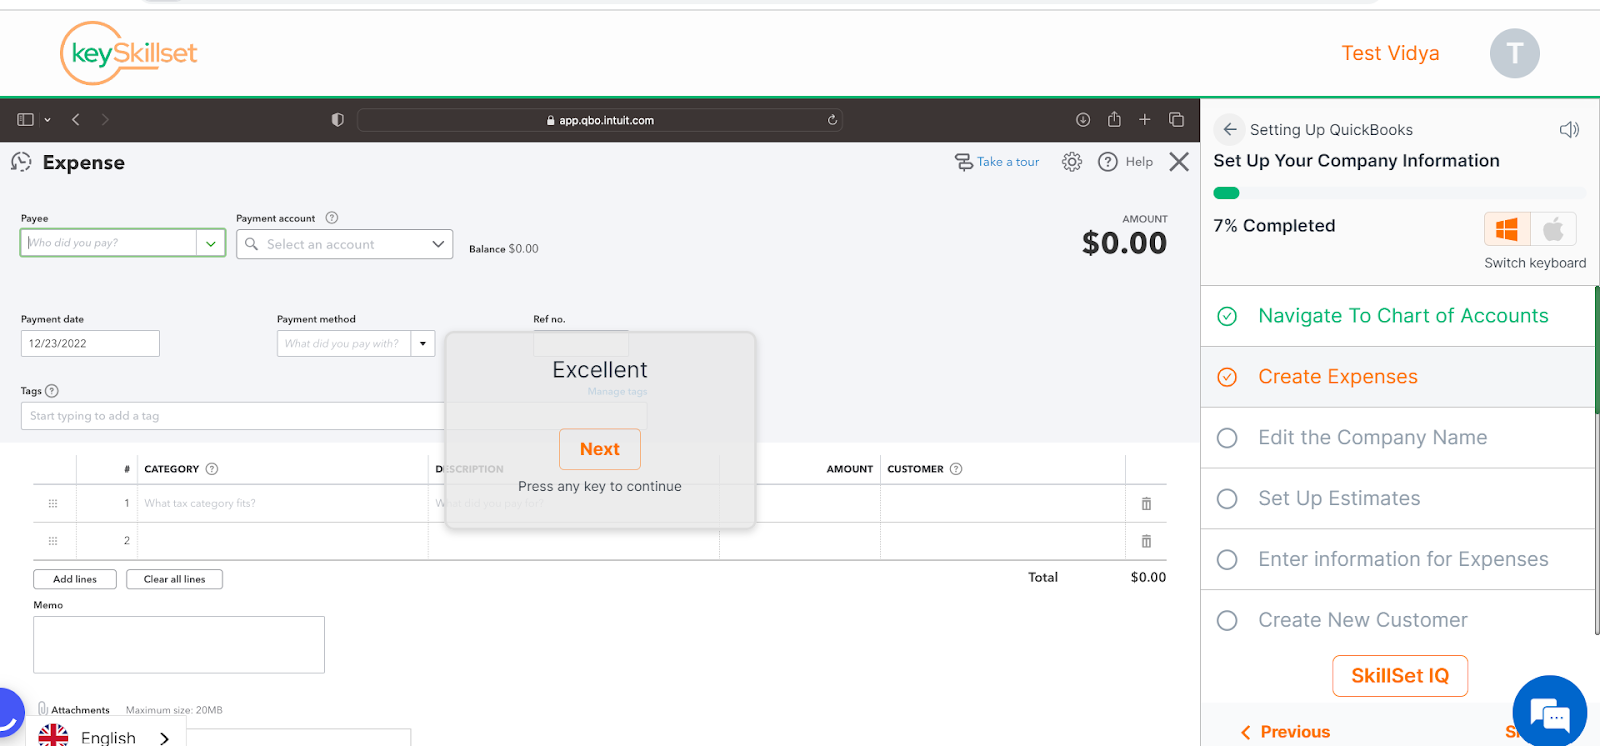
And on using the command prompt the expense page is created
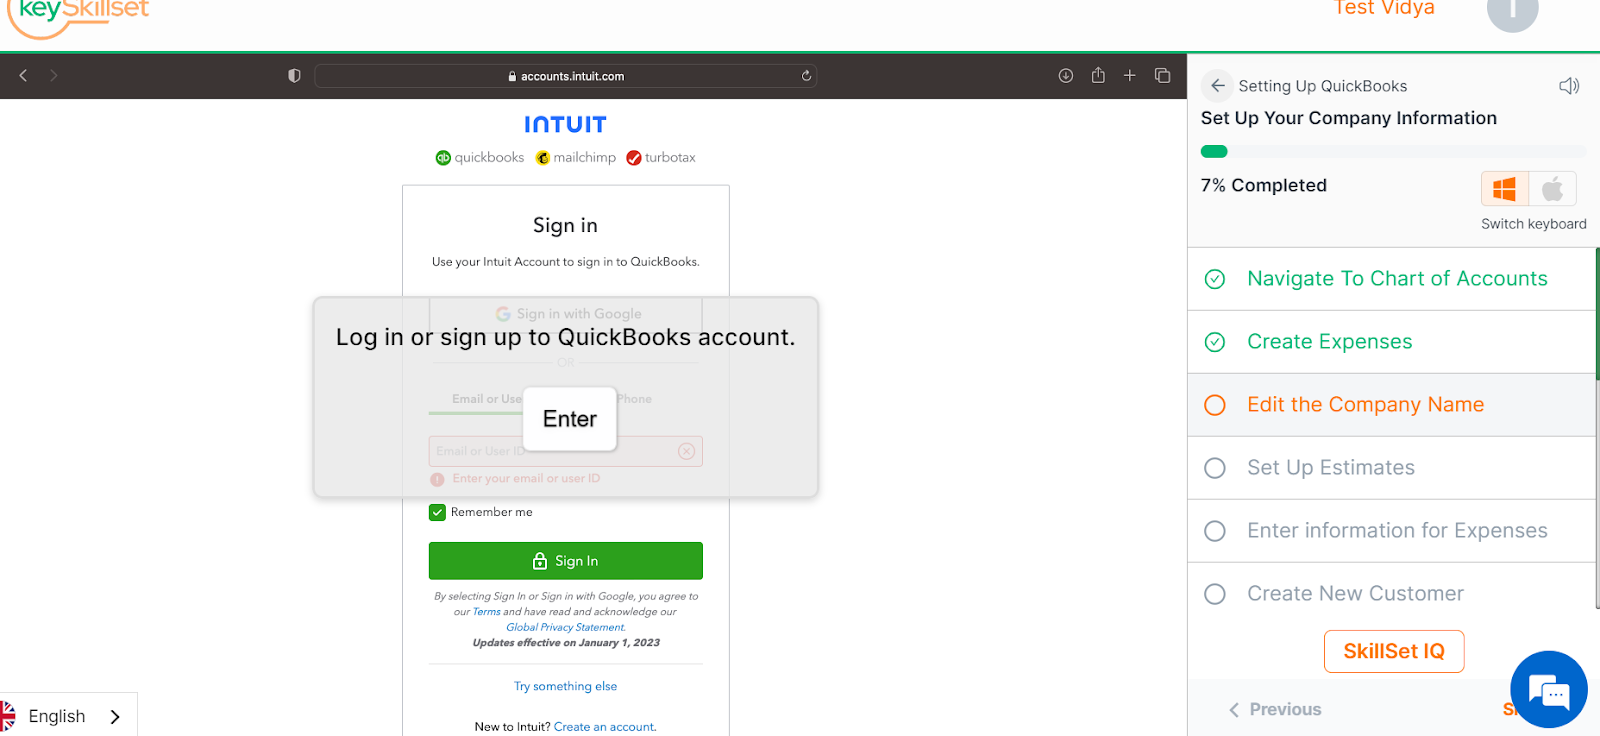
Step 3: Now we will tell you how you can edit the company name. First, you need to log in or sign up for the QuickBooks account.
(The command prompt on our platform shows Enter)
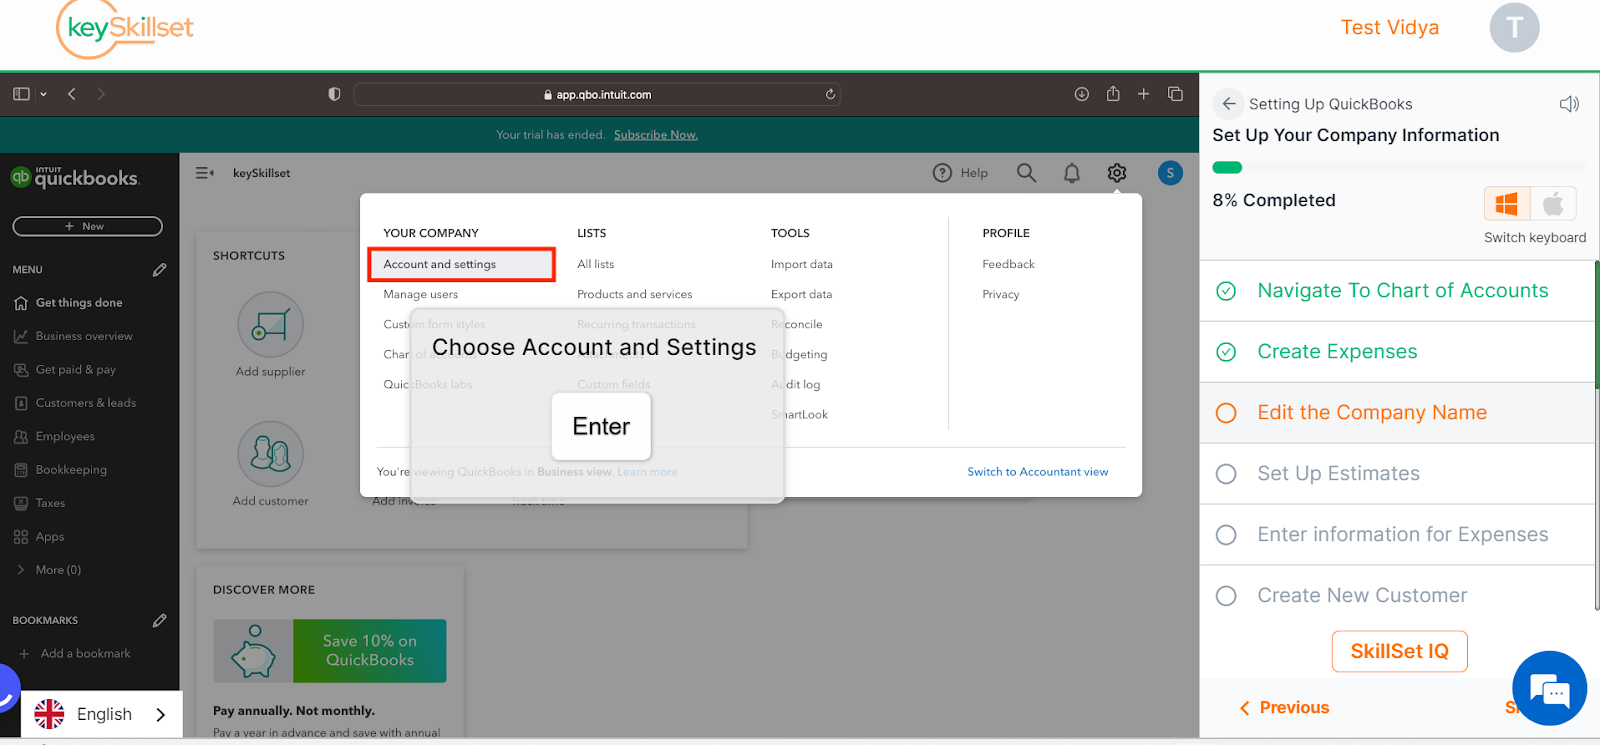
Step 4: Then, click on the gear icon

Step 5: Then you need to go to the account and settings.
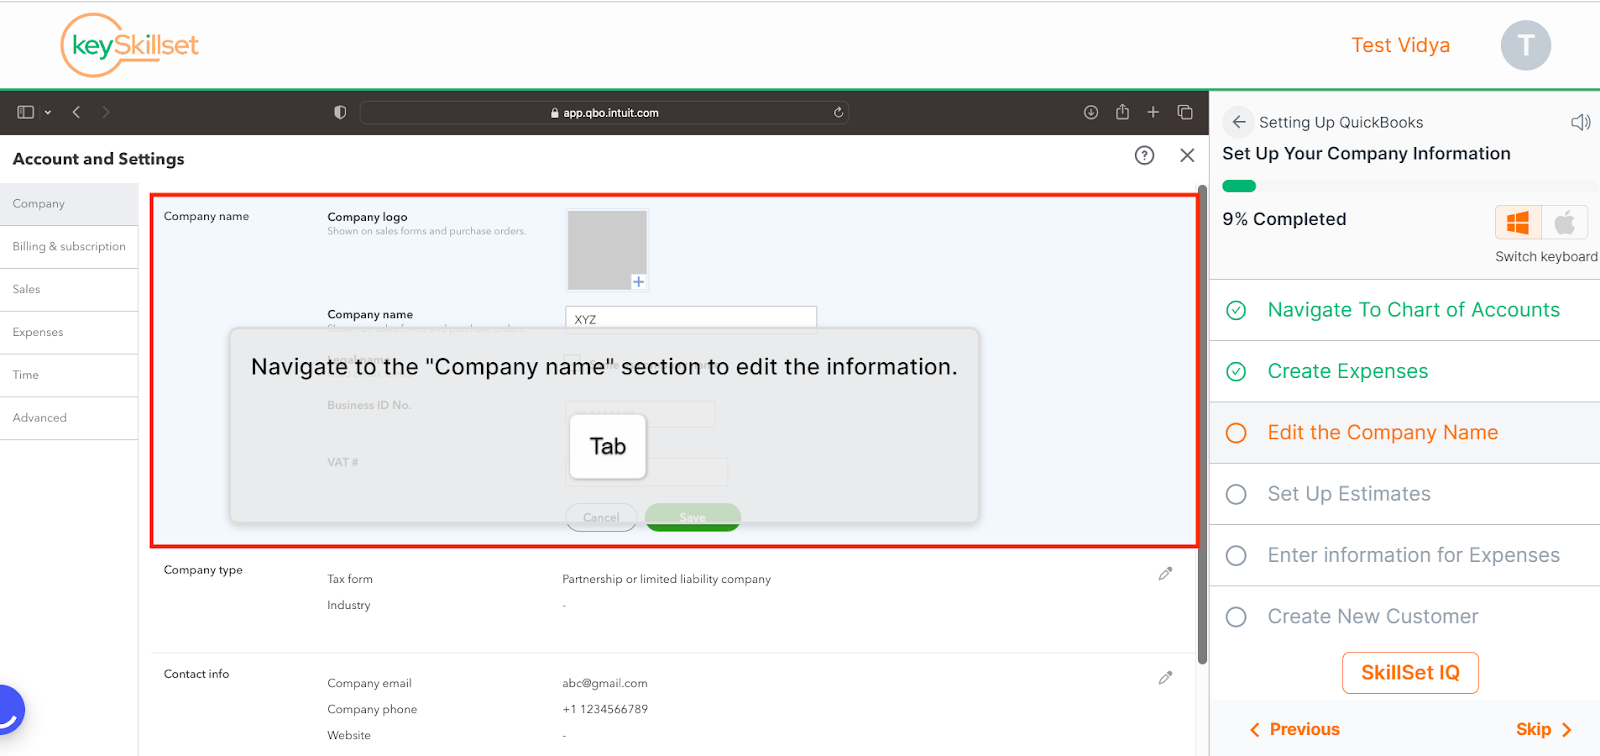
Step 6: Now, the company name section includes three items. They are as follows:
- A. Company logo: Import your company logo to include it on customized forms.
- B. Company and legal name: Enter your company names as you would like it to appear on your invoices and other forms.
- C. Business ID No.
- D. VAT #
Now, navigate to the “company name” section to edit the information. And click on the “tab” command.
Step 7: After making the required changes, you can save the changes. Command prompt for this is Ctrl+ Alt + D
Here, you can see that the company name has been set up
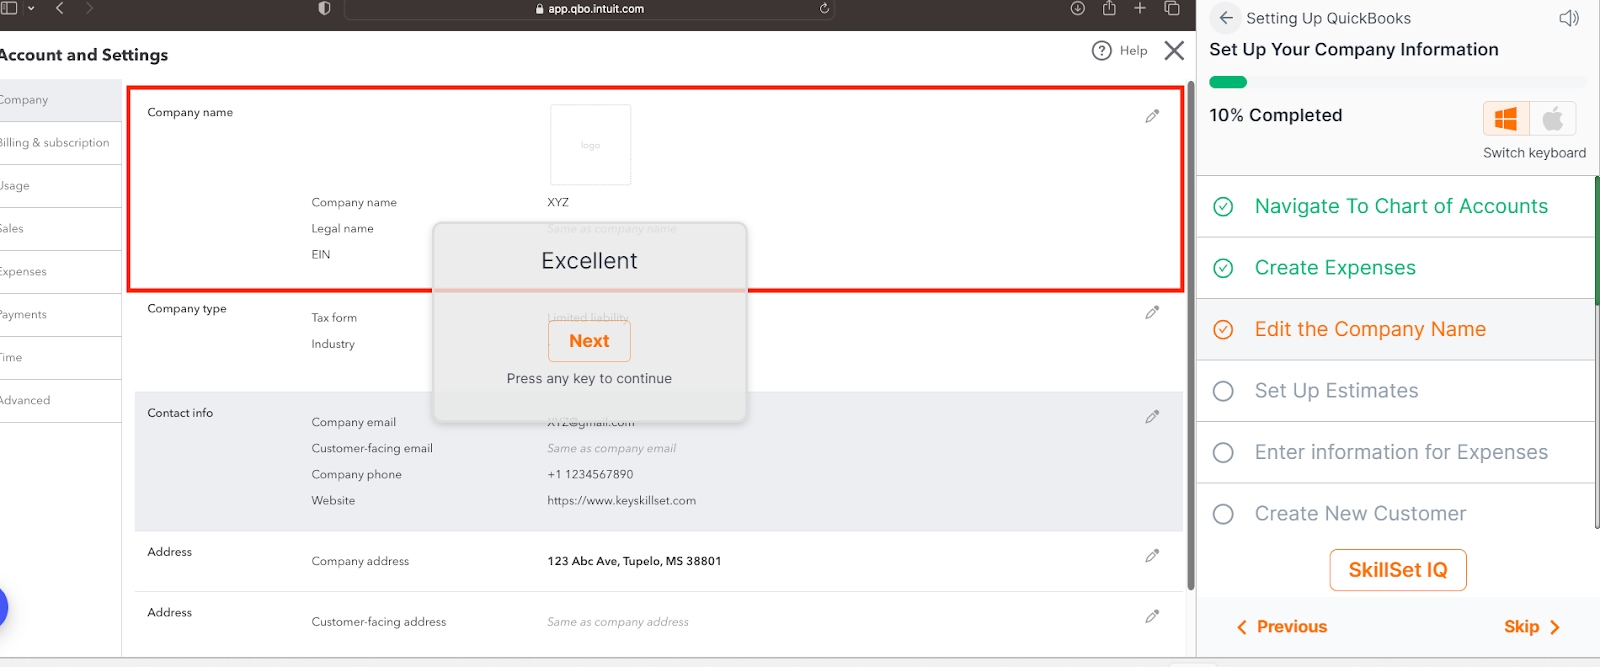
Step 8: You can set up estimates for QBO. Click on Control + Alt + E.
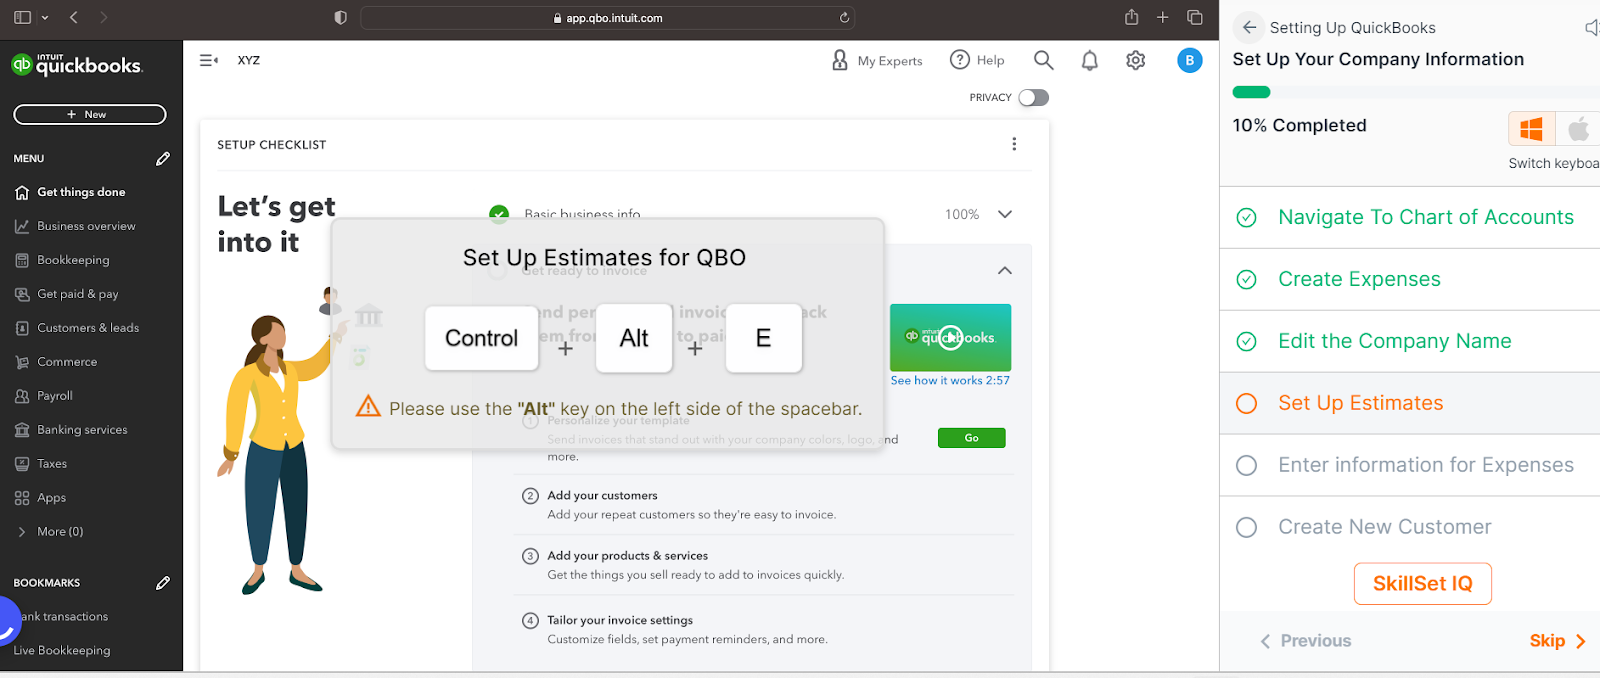
You can see the estimates are set up
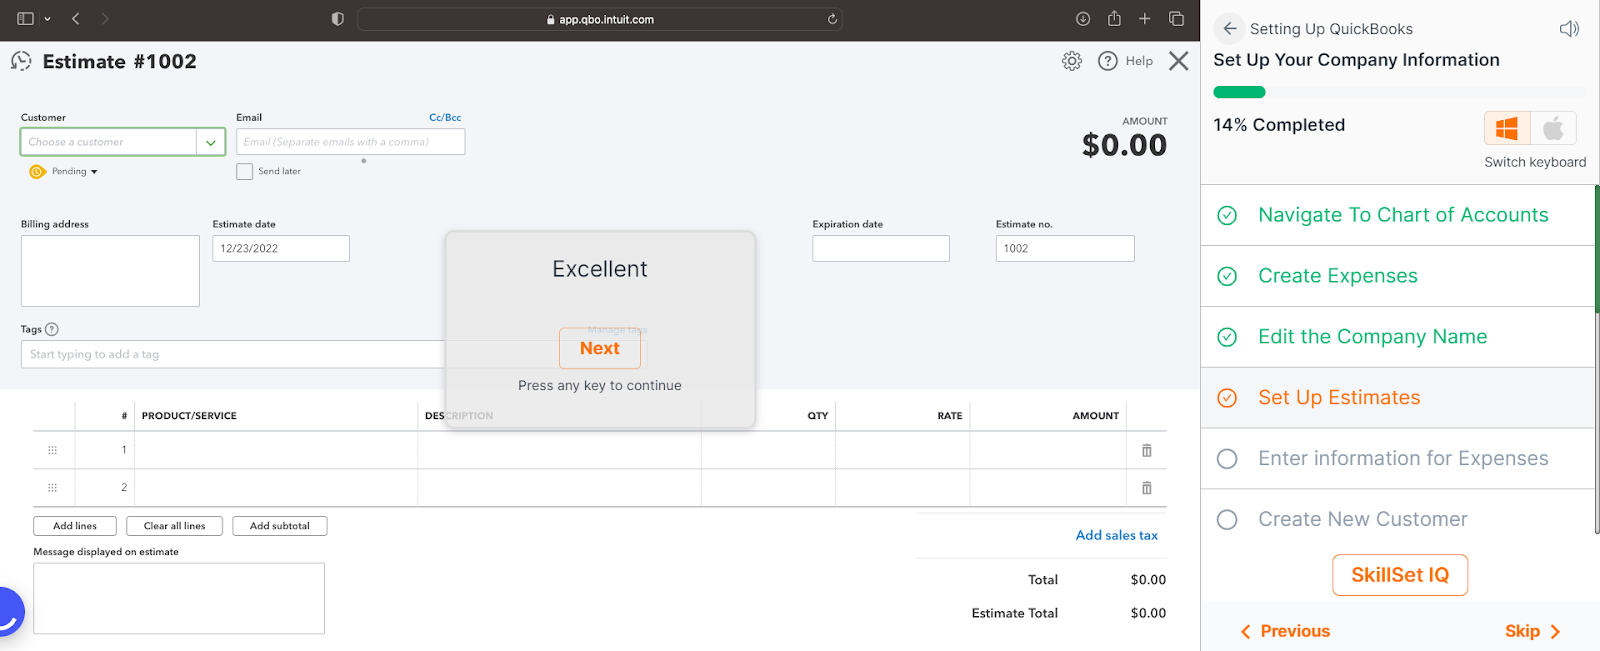
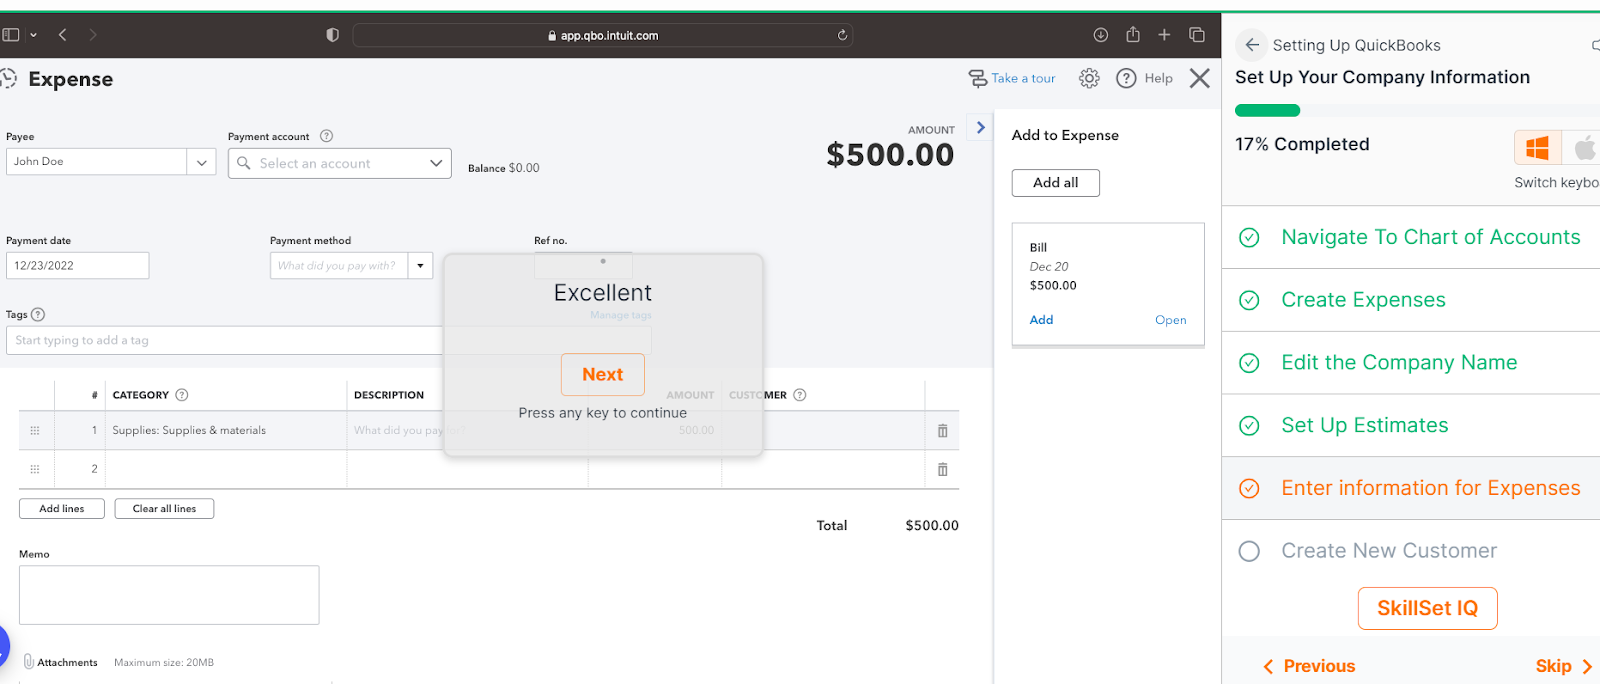
Step 9: Now, you need to fill out the information for expenses. Press “tab”.

Here, the screenshot shows it’s filled up. Expenses are filled as $500
Step 10: You can also create a new customer in your QuickBooks account. Click on Control + Alt + C.
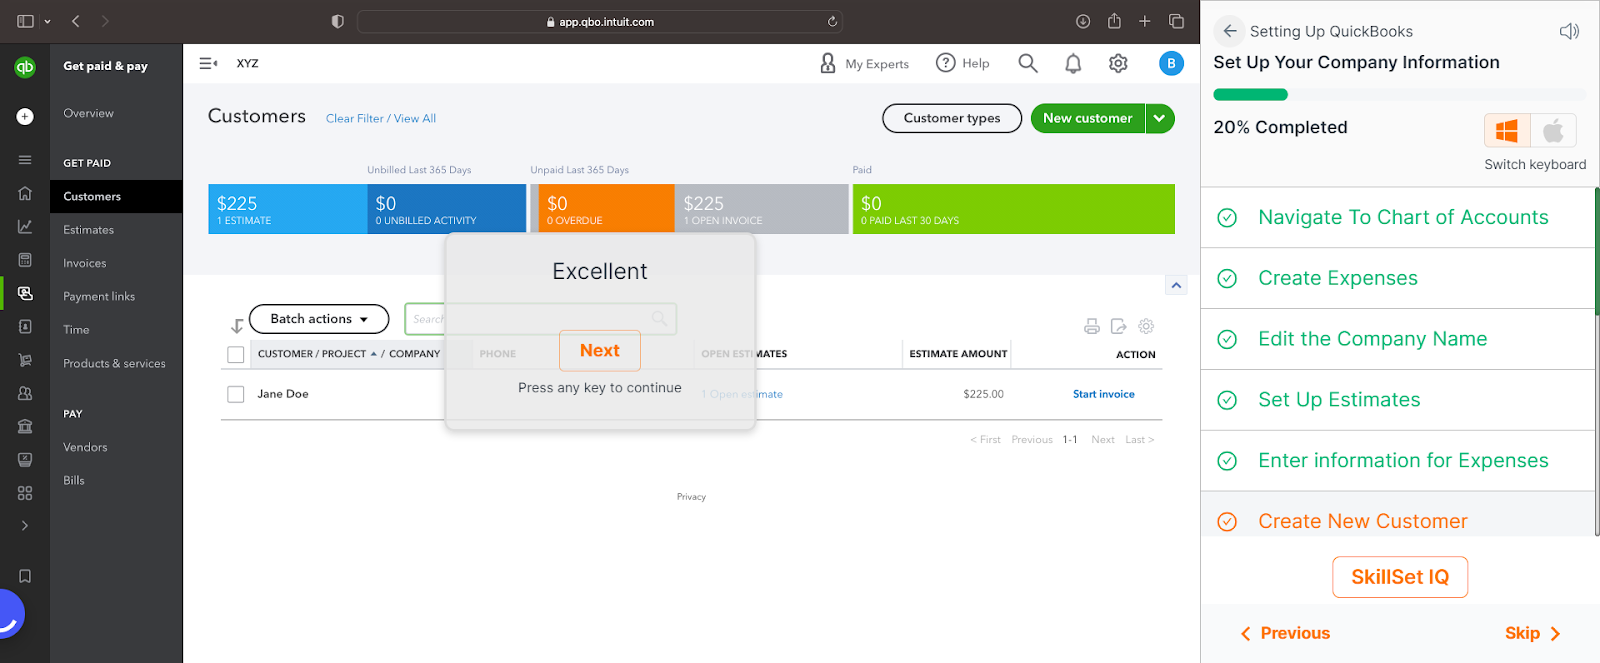
And as you can see in this screenshot below, the new customer has been added.
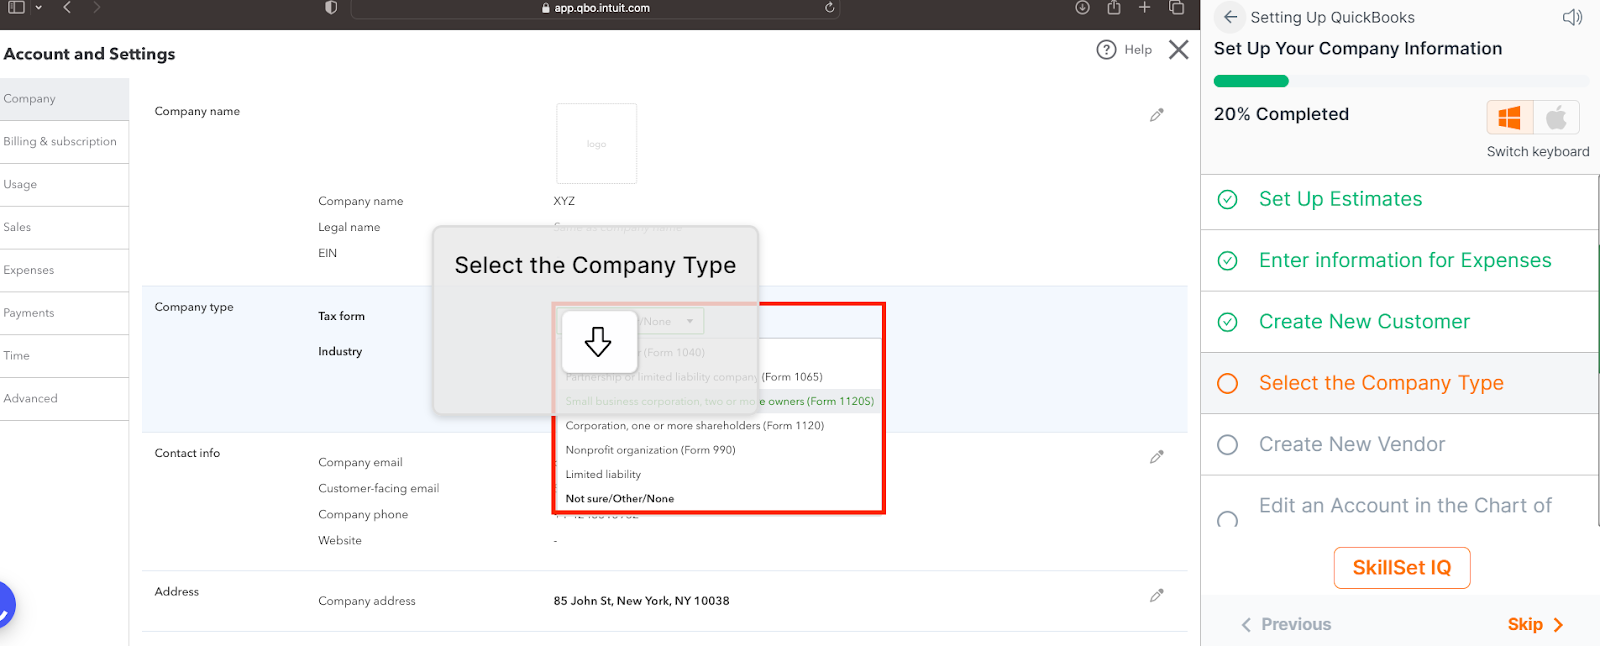
Step 11: Then you can select the company type. Click on the below arrow as indicated in the screenshot below to get the list of company types. They are
- Sole proprietor: You're sole proprietor if you're the only one who runs the business.
- Partnership: Select this business type if you're carrying out your business with two or more partners.
- S corporation: A corporation that elects to be an S-cor passes corporate income, loss, and taxes through to its shareholders.
- C corporation: A corporation that qualifies as a C-corp is taxed separately from its owners, rather than passing through to owners.
- Nonprofit organization: Nonprofits are tax-exempt corporations that are focused on social causes rather than generating income.
- Limited Liability Company (LLC): Select this business type if you're unsure whether to file taxes as a sole proprietor, partnership, or S-corp
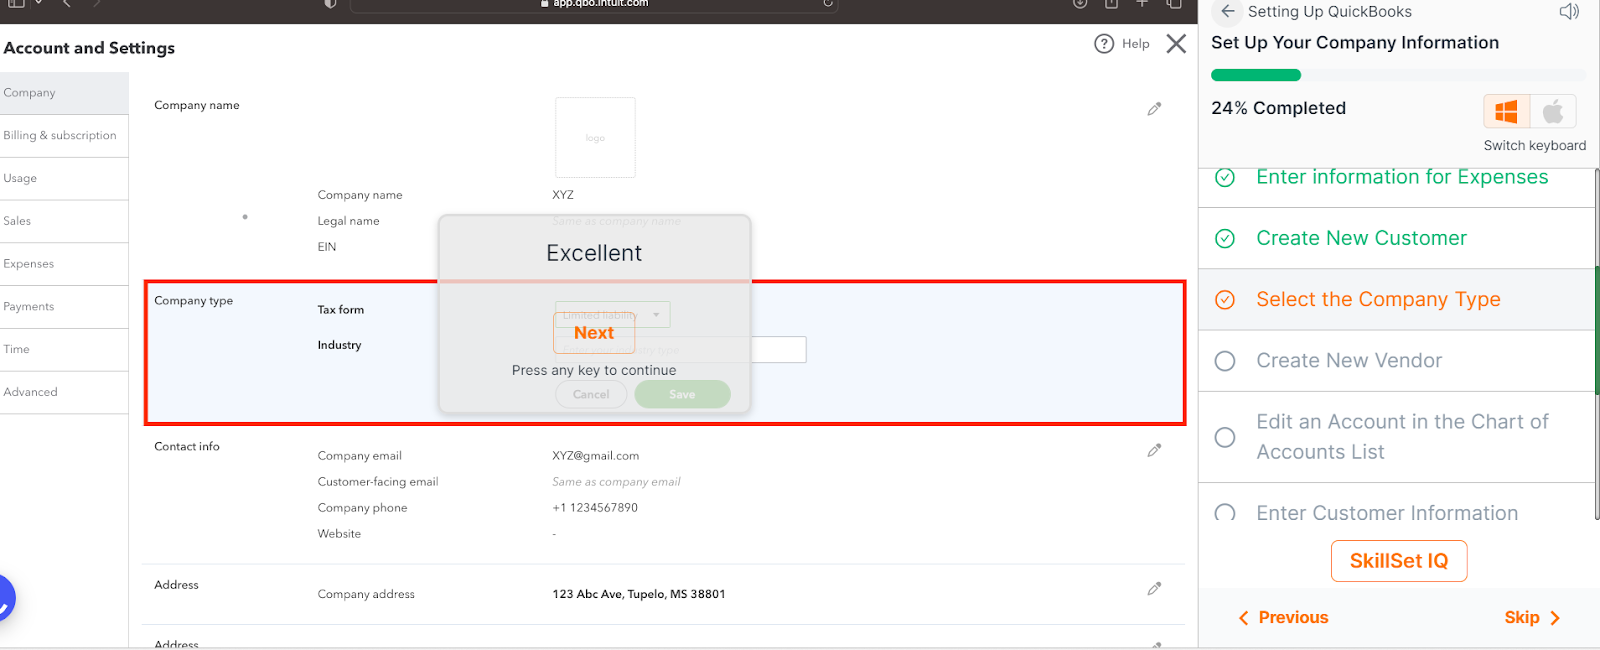
Click Enter. Details for the company type are filled here.
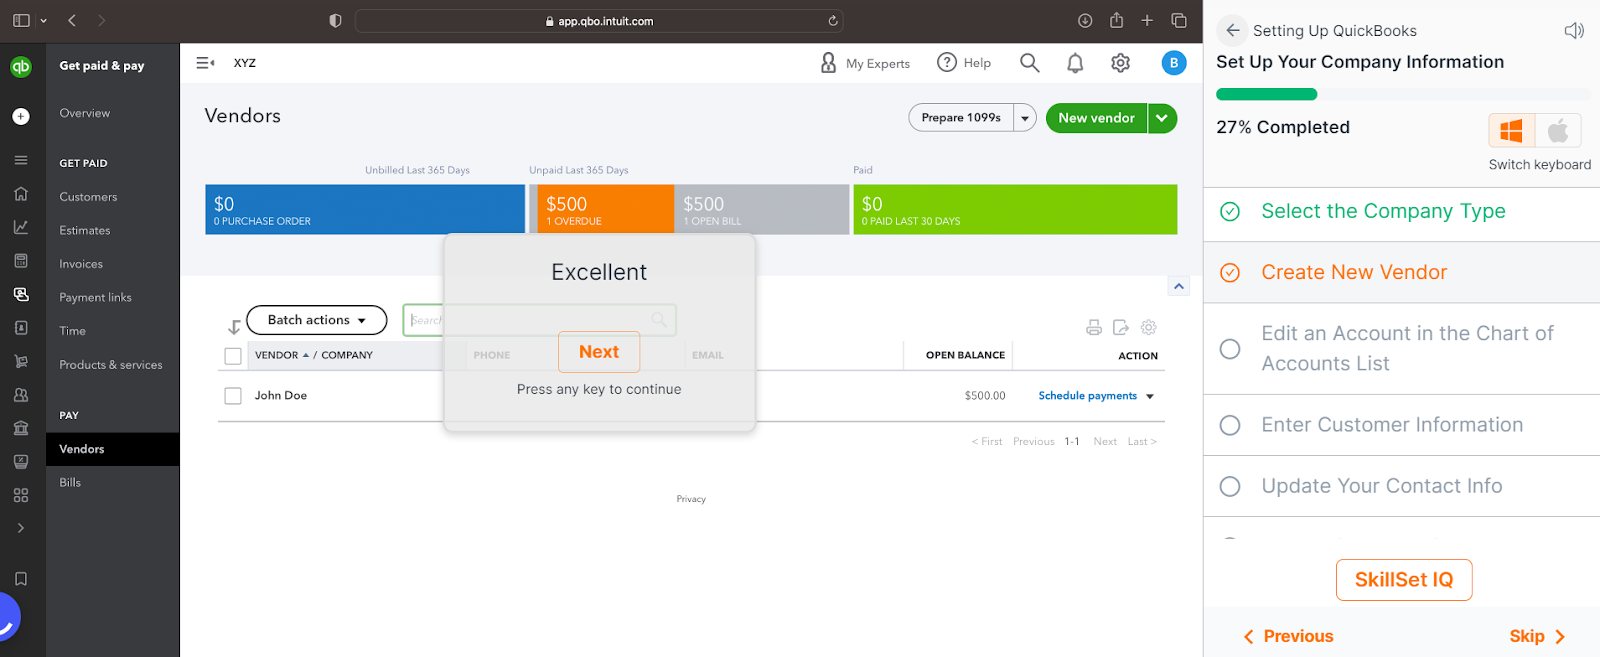
Step 12: Create a new vendor. Click Control + Alt + V
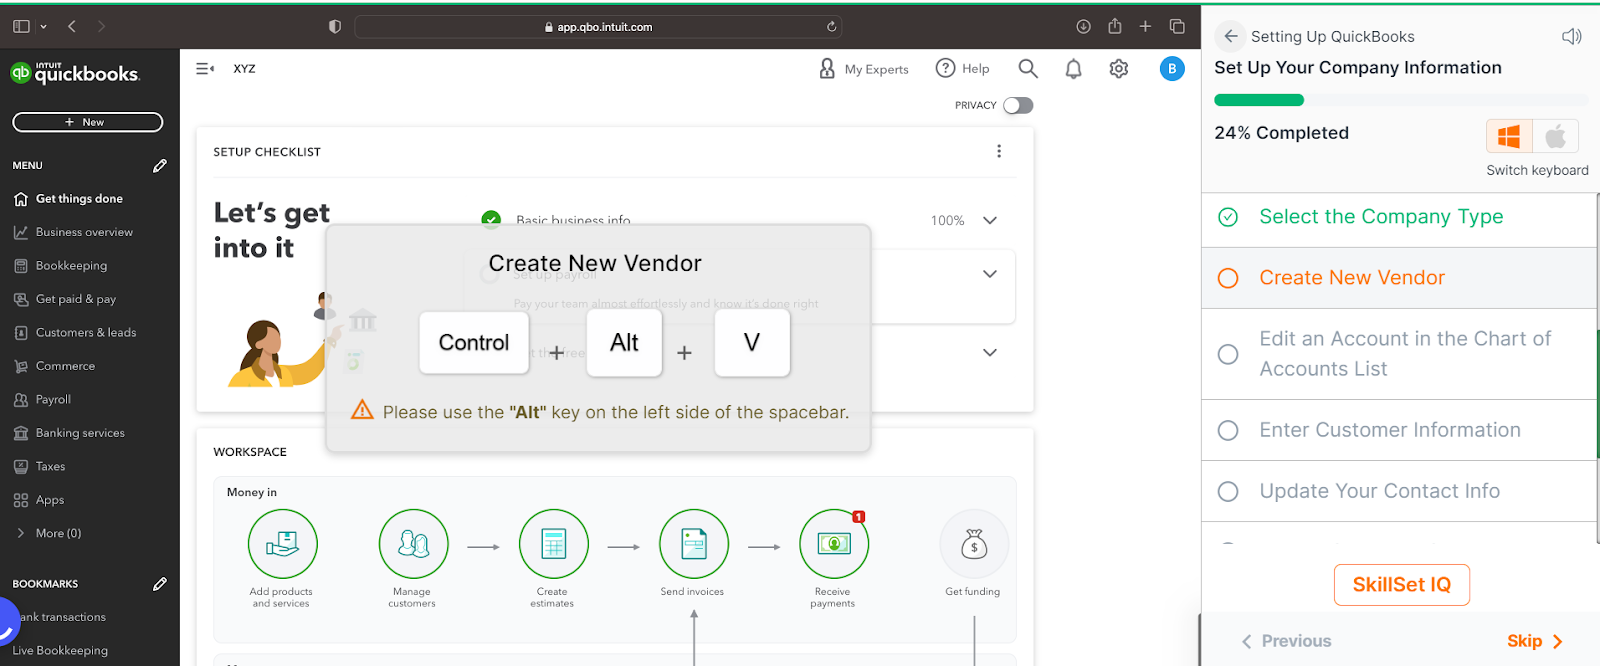
So, here the vendor is created(screenshot) below:
Now, how do you edit an account in the chart of accounts list?
Step 13: Go to the right corner and under the action section, there is the view register function and in the drop down, you can find the Edit function. See, the screenshot given:
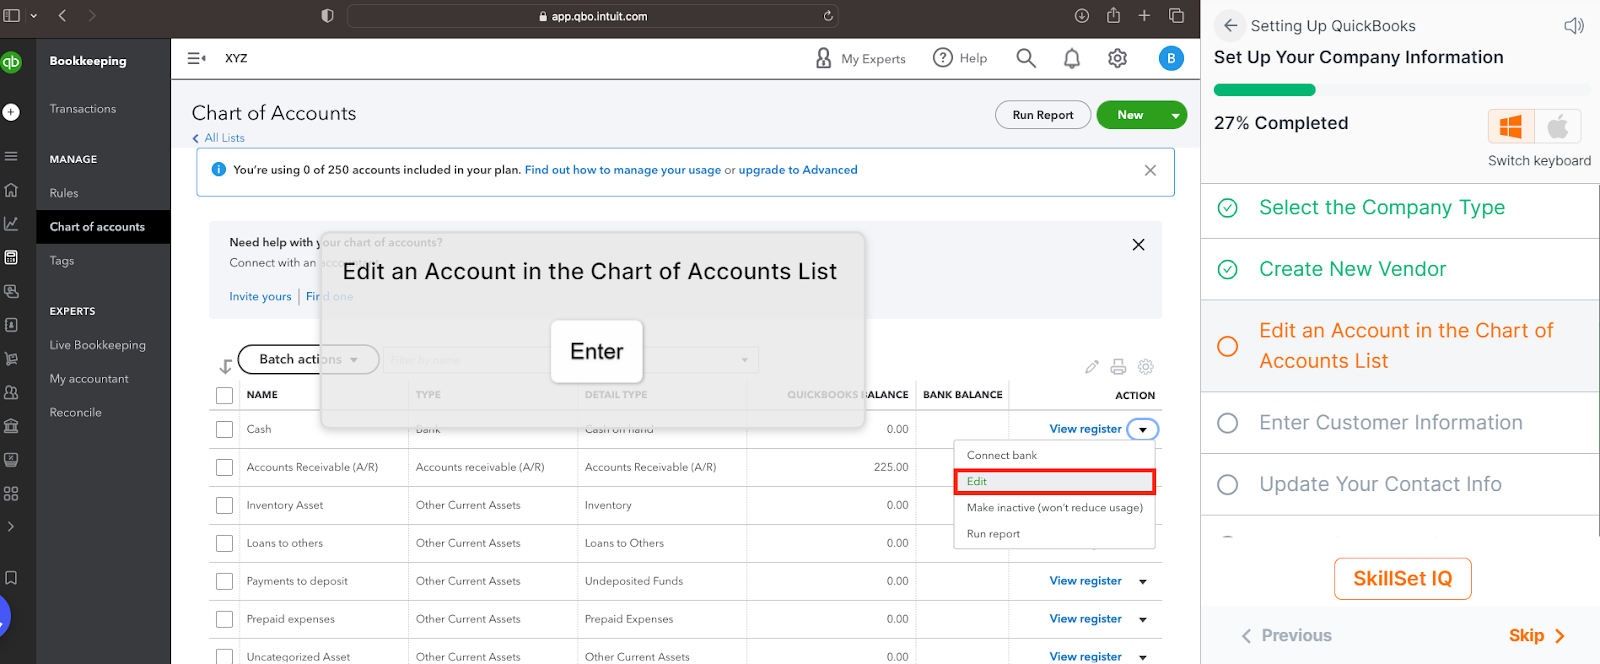
And on clicking Enter, you can see

Step 14: You have to enter the customer information.
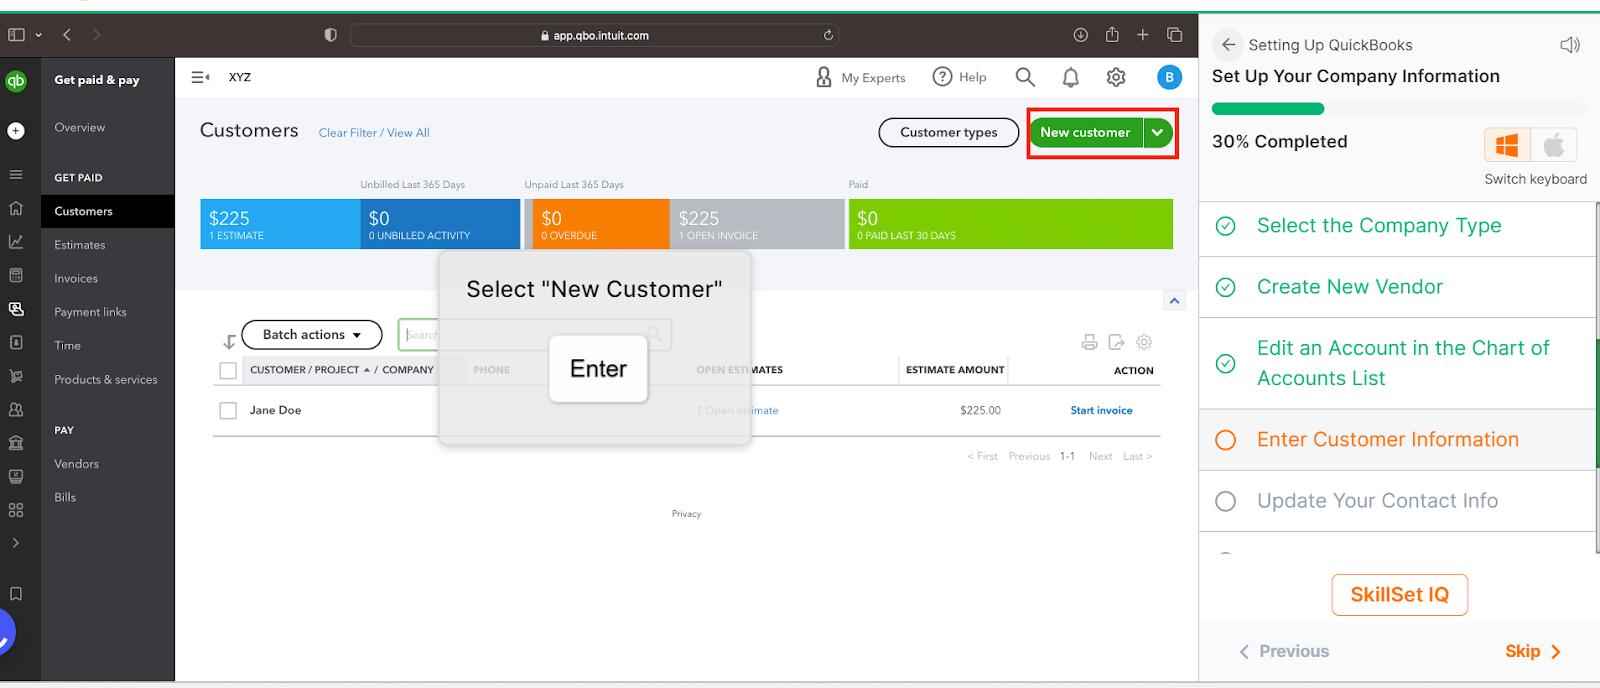
Press on Enter.
Step 15: Enter the name and contact details in the space provided in the pop-up.
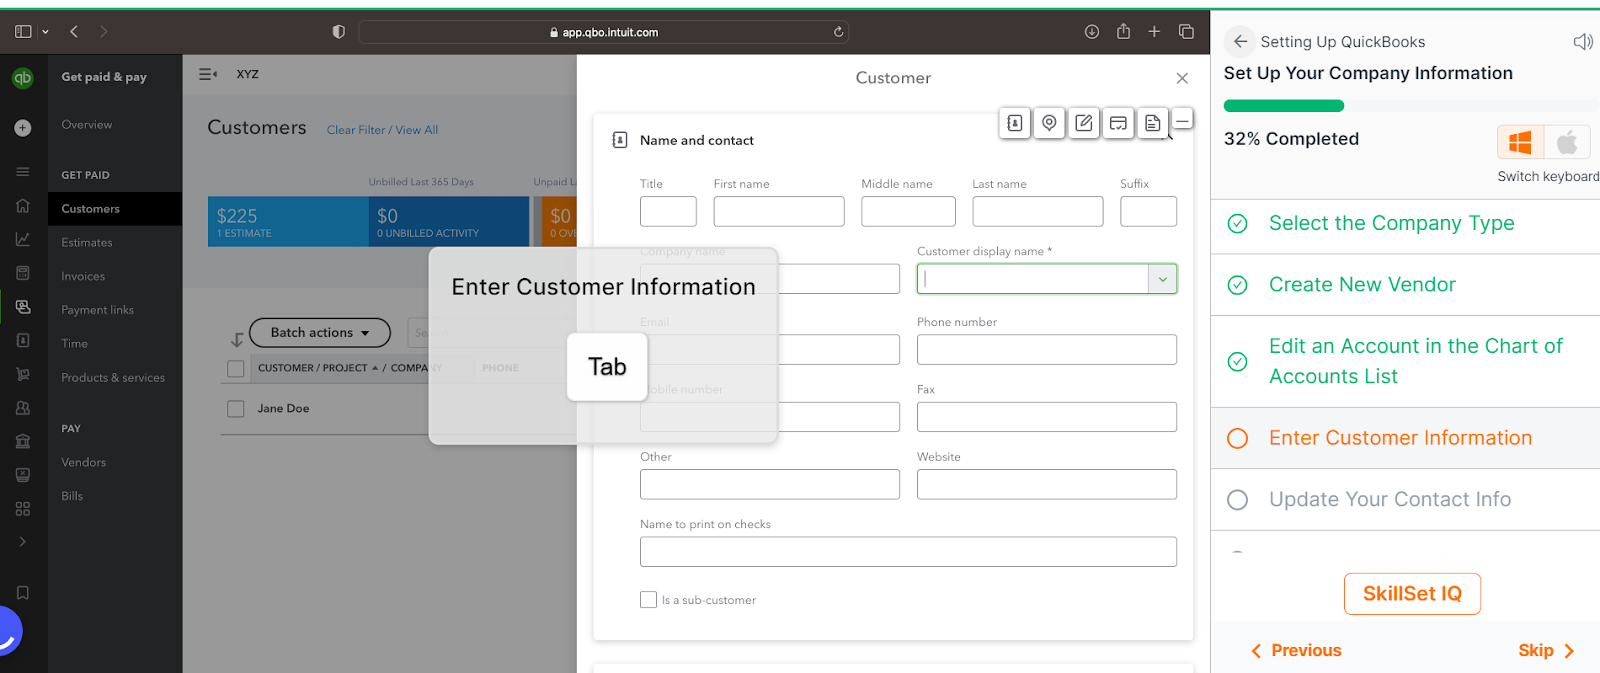
Once you click on the tab, you can see that the numbers are entered here.
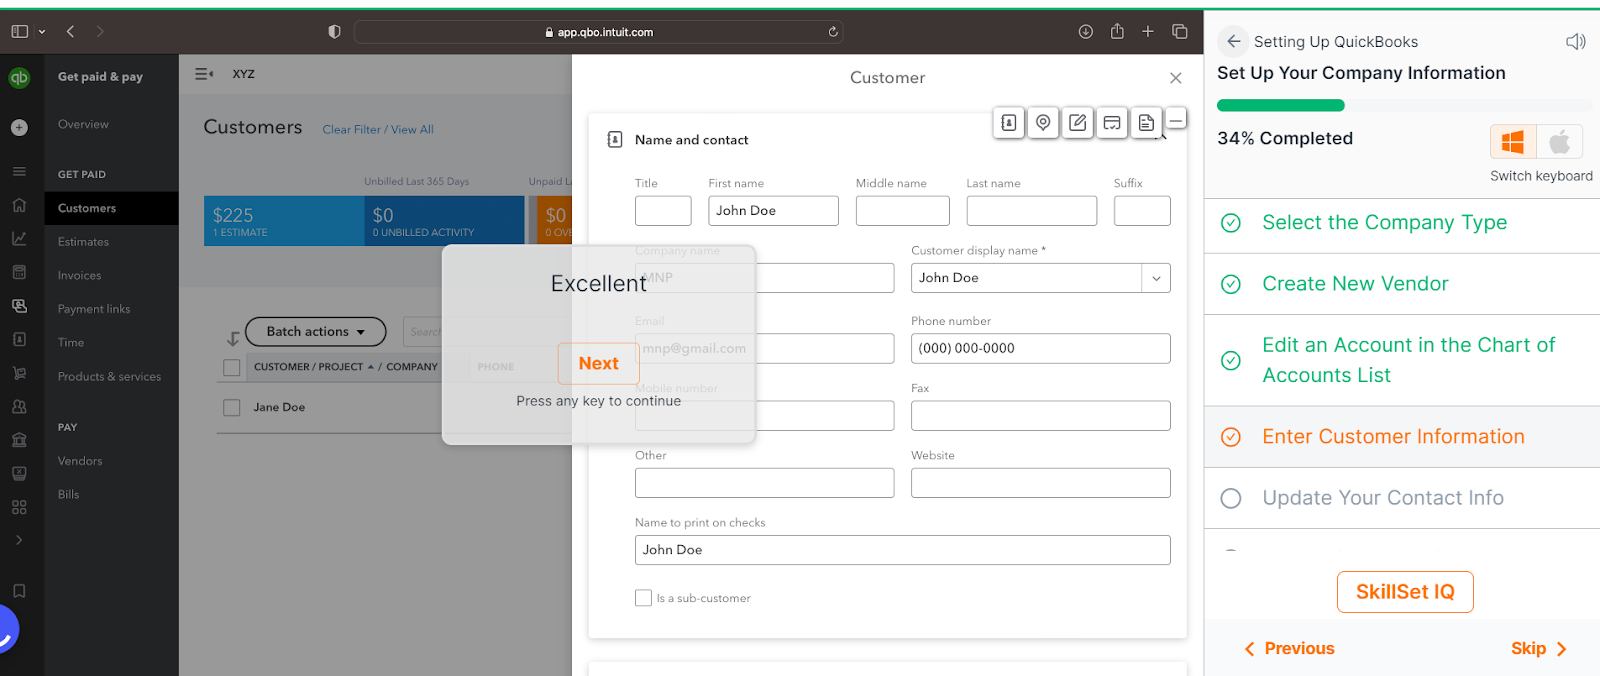
Step 16: You are required to update your contact details. You can fill in these details:
- Email: Your company email is the address QuickBooks will use to contact the QuickBooks administrator.
- Company Phone: Enter the phone number that should appear on the sales forms sent to customers.
- Website: Enter a website address to appear on all your sales forms.
Click on Enter and you see the details are filled out.
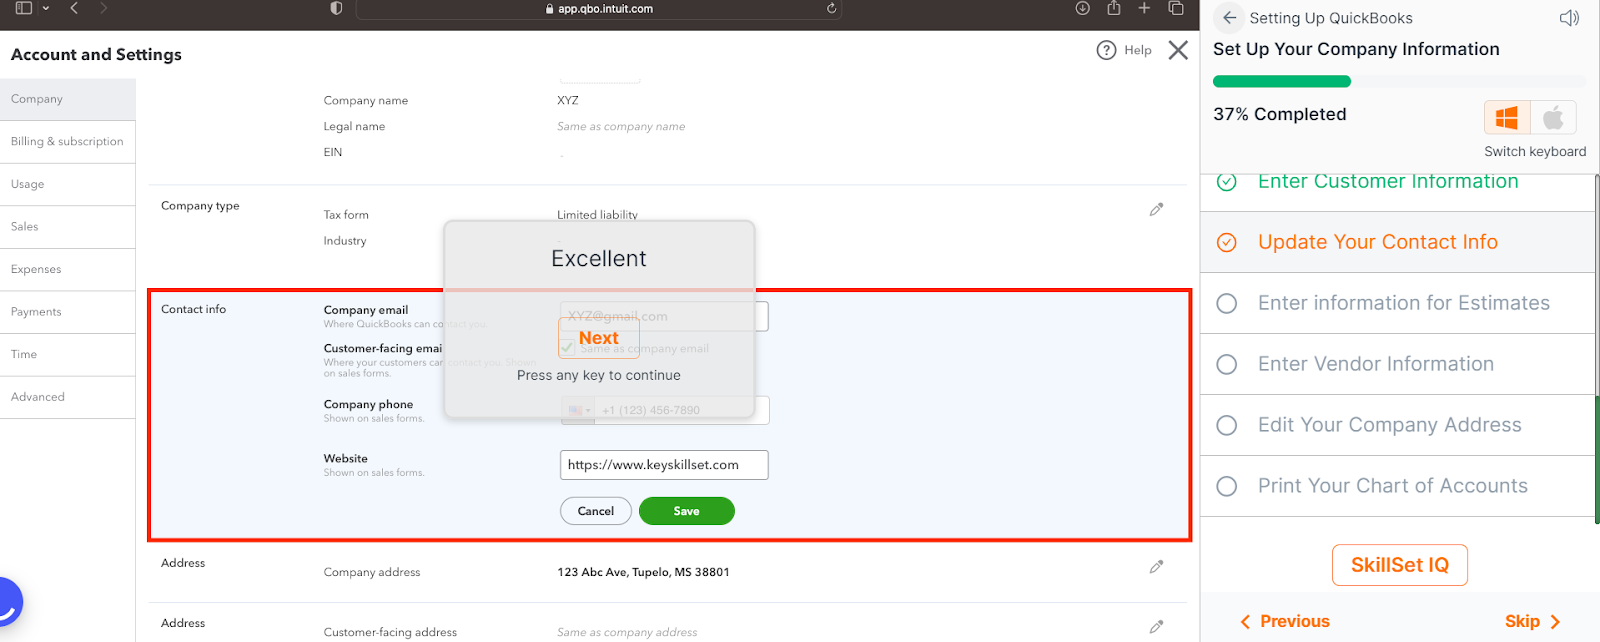
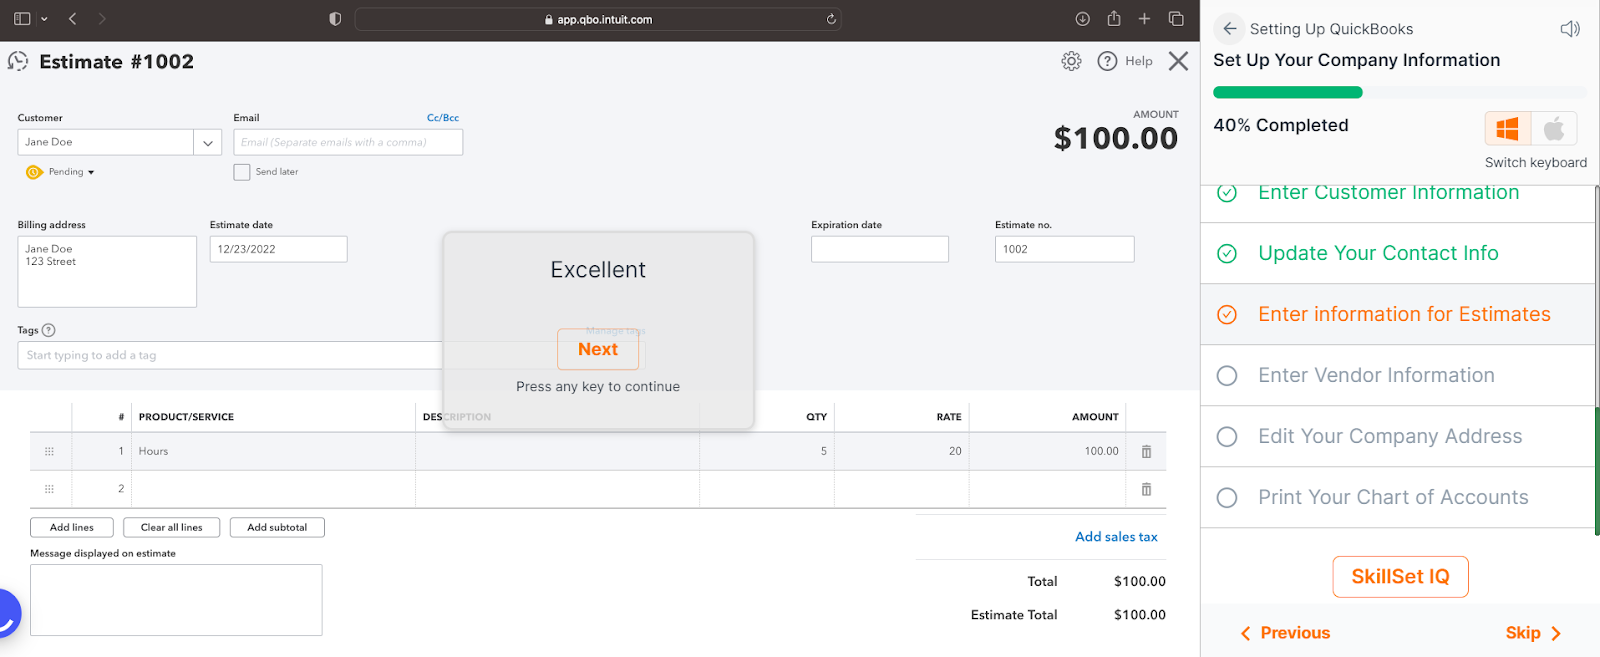
Step 17: Enter information for the estimates
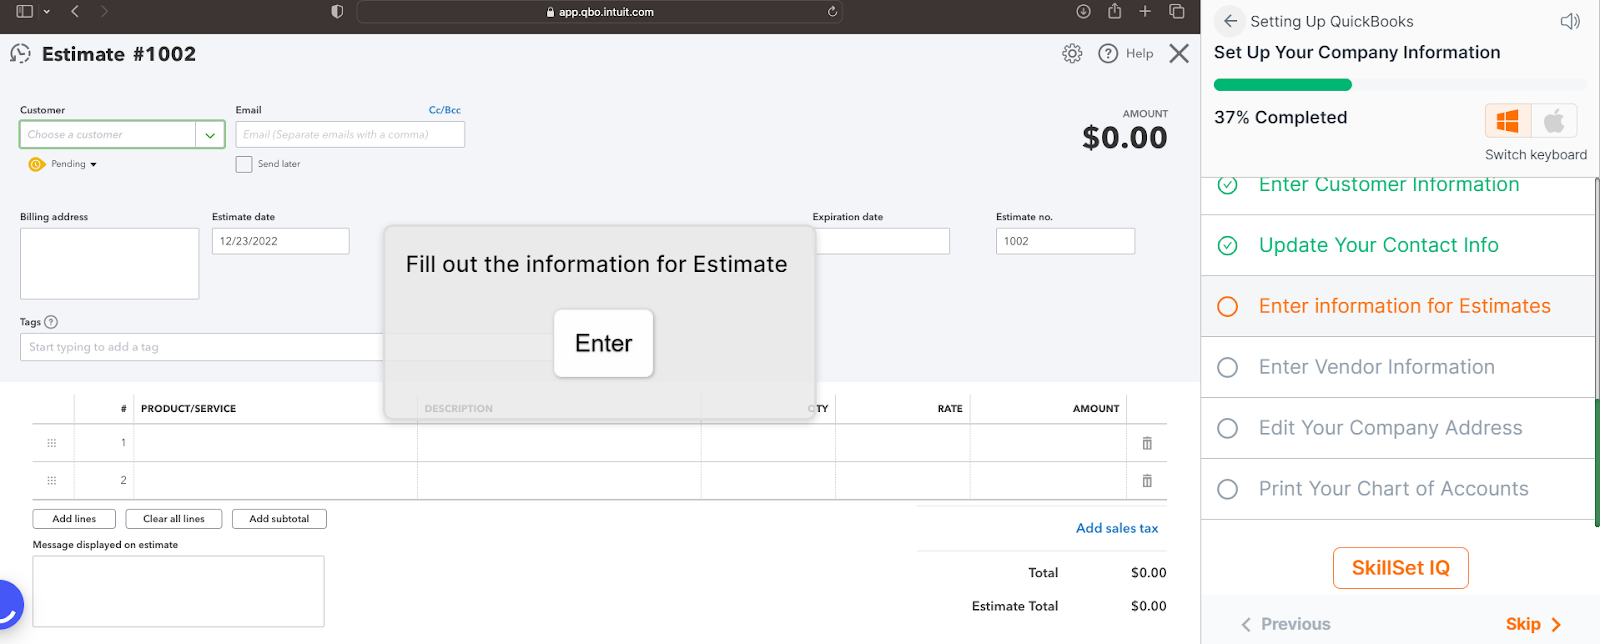
Click Enter, you see the details are filled out,
Step 18: Now, enter the vendor information.
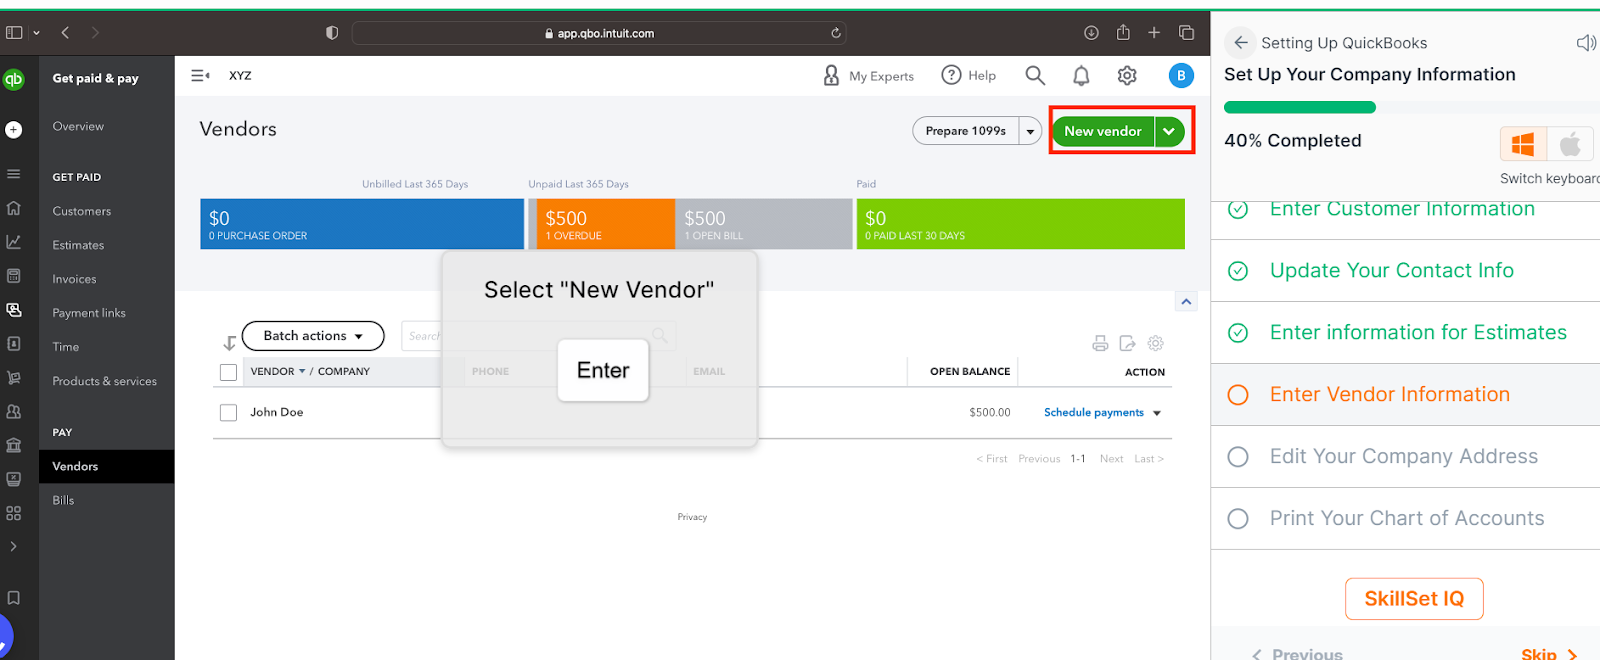
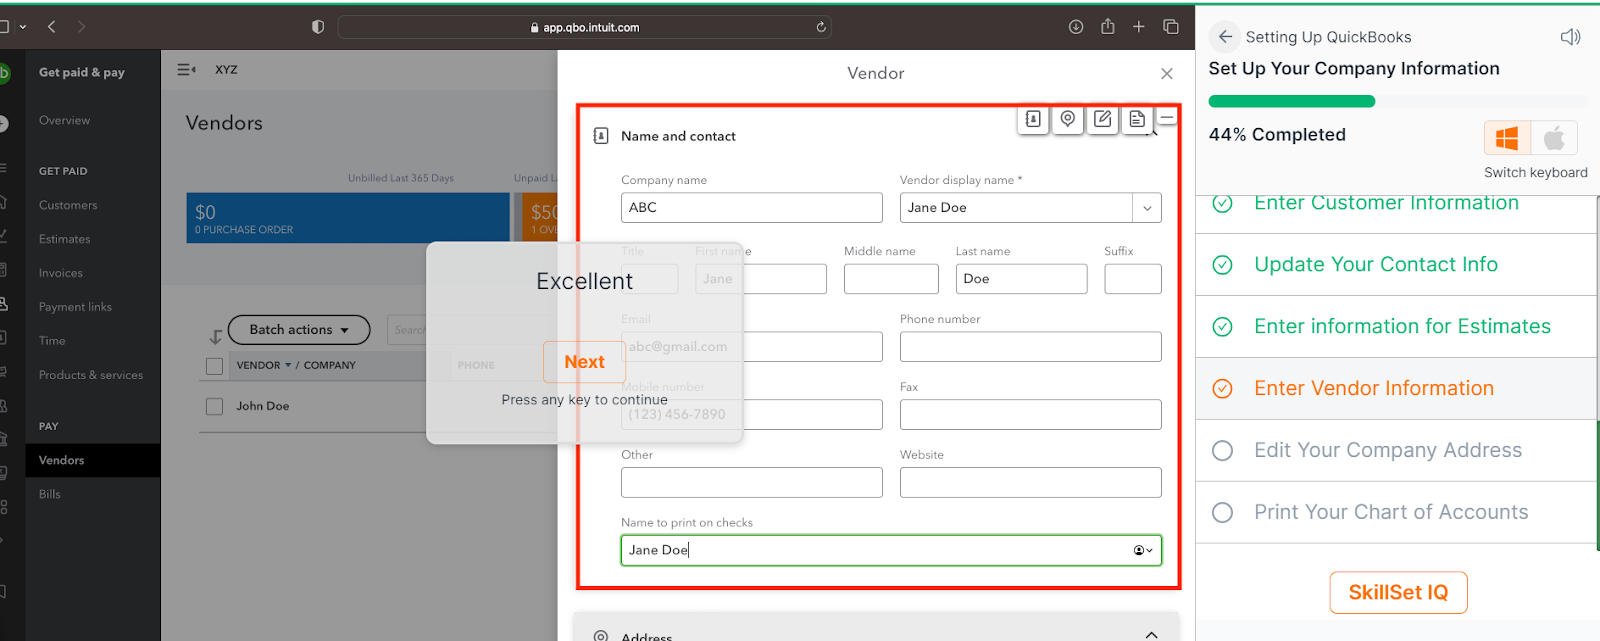
Click on Enter,

Press tab, and you see the information is filled out.
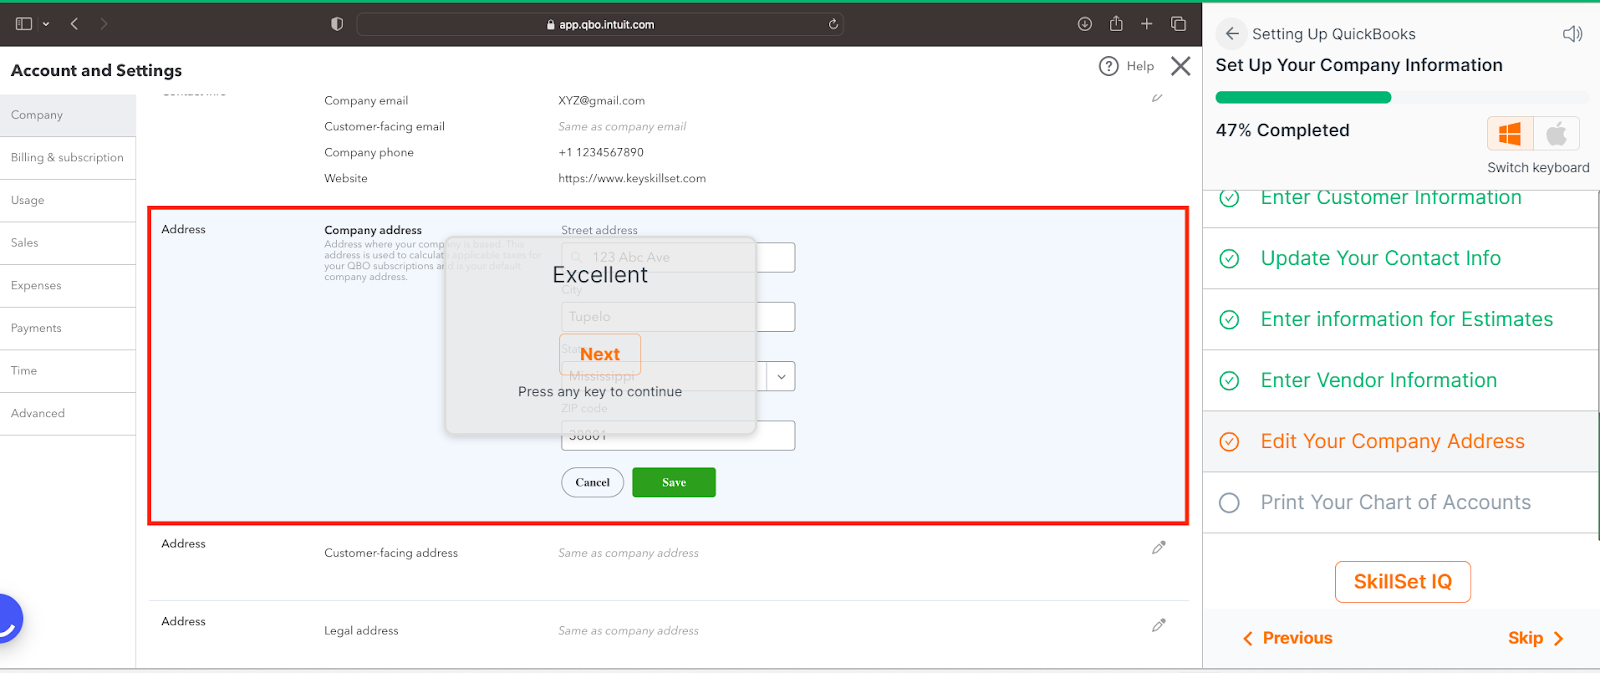
Step 19: Edit your company address on QuickBooks
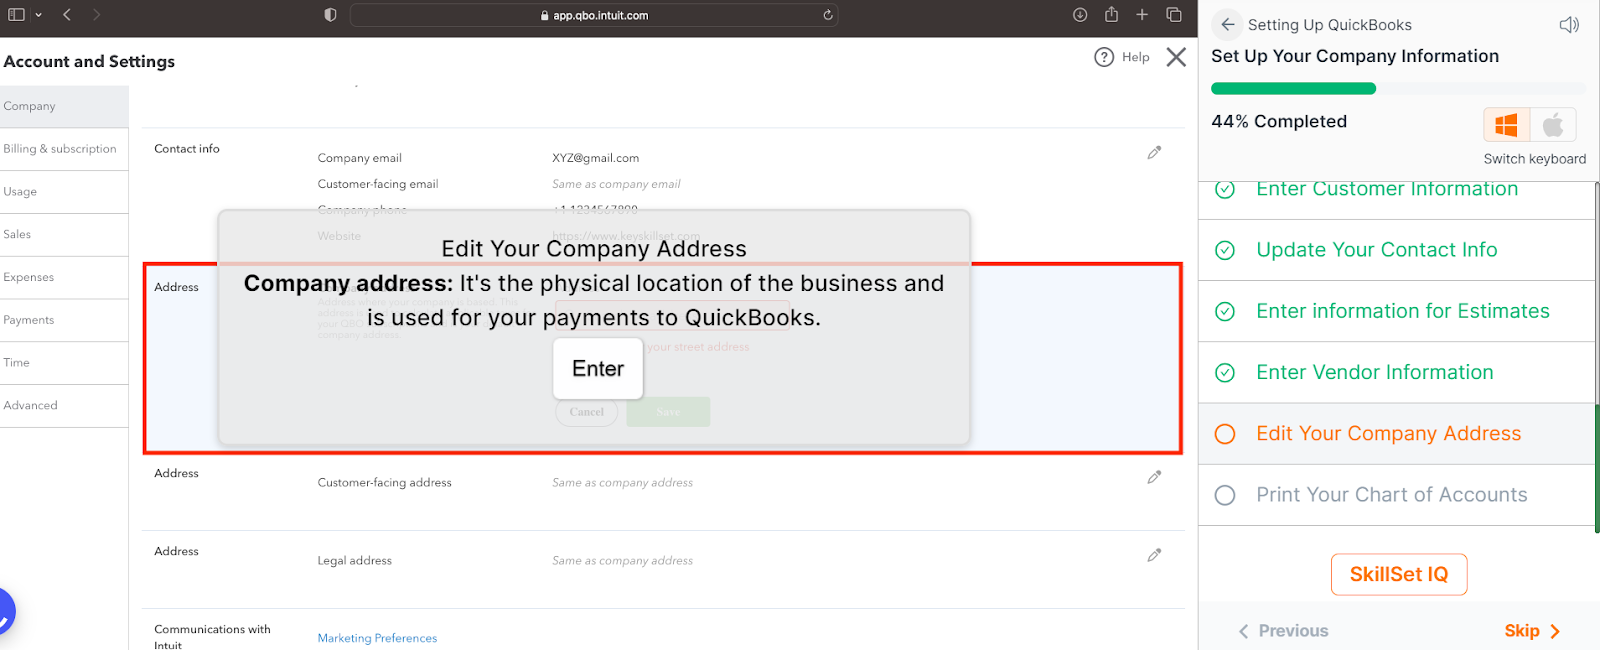
Click Enter and you see the details are entered here
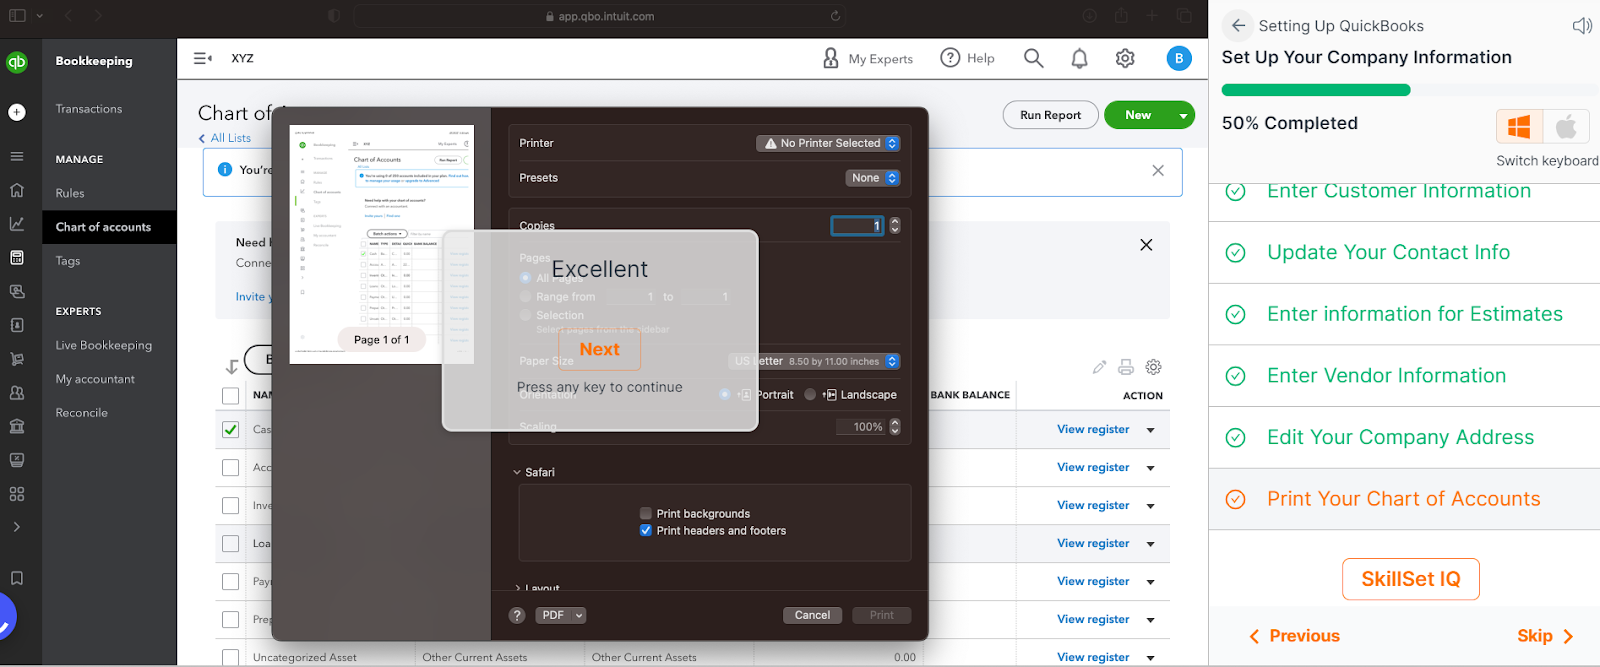
Step 20: You can print your chart of accounts.
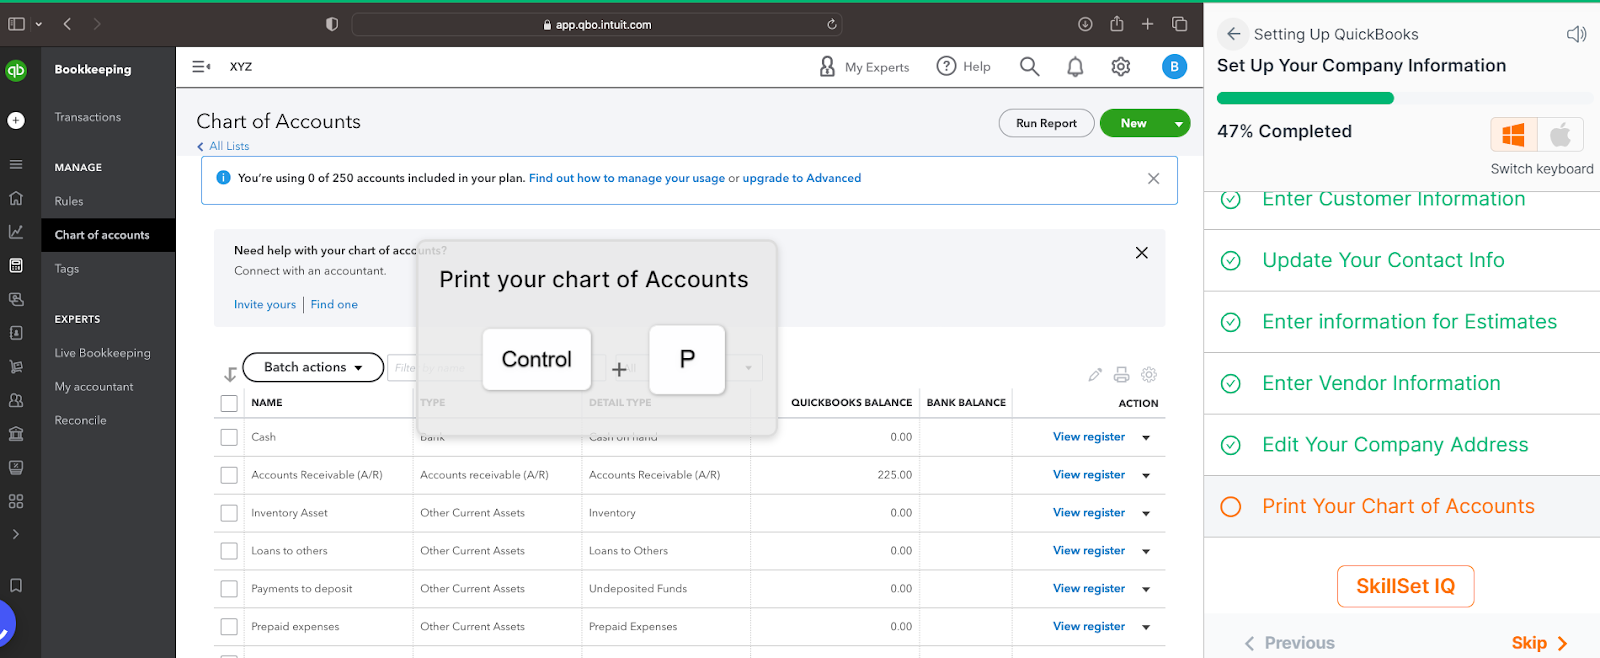
Click Control + P
Conclusion
You can see here that setting up QuickBooks is an easy task and once you have mastered the hacks, even if you have minimal accounting knowledge you should be able to use it seamlessly. This is where, keySkillset can help. It brings its new and comprehensive QuickBooks course, which can help people to increase their speed and efficiency in using QuickBooks at work.


.png)
.jpg)
.jpg)


.jpg)
.jpg)


.png)

