


Steps for good-looking tables in PowerPoint
Tables are everywhere in business – price lists, KPI comparisons, project meetings, quarter review meet-ups, accounting audits… Sounds familiar? We use tables a lot, they are one of the most common ways to present data. Making tables in PowerPoint or Excel is simple and quick. However, usually, those tables look pretty boring. It’s time to change that!
Let me show you some easy steps you can use to quickly change default data tables into more attractive table graphics.
How to work with tables for PowerPoint?
When you’re putting a PowerPoint presentation together for your colleagues, it’s just as important to include visual information as it is to add text. You may have the best lecture that anyone in your department has ever heard. However, you won’t get a good reception among your peers if you don’t learn the differences. Sometimes people won’t be able to fully comprehend your ideas if you don’t give them a visual example to work with.
Not sure how to start making your presentations more viewer-friendly? Don’t worry! We’ve put together a guide to help you become an expert at making tables in PowerPoint!
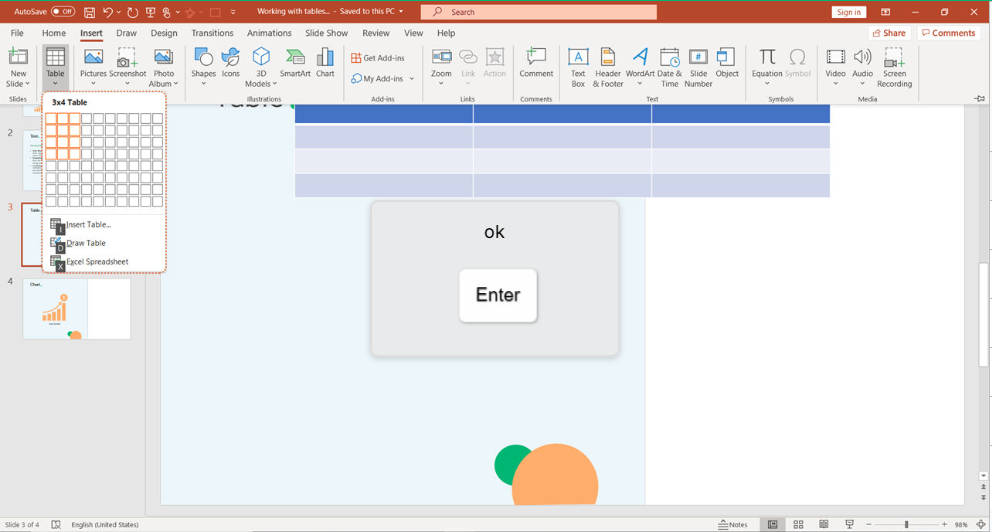
If you want to insert a table on your slide, use Alt N T.

Once you used the shortcut, a small window will appear. That’s where you can select the number of rows you need as well as the number of columns. Select them by clicking on the Arrows (Right and Down) on your keyboard. Then press Enter.

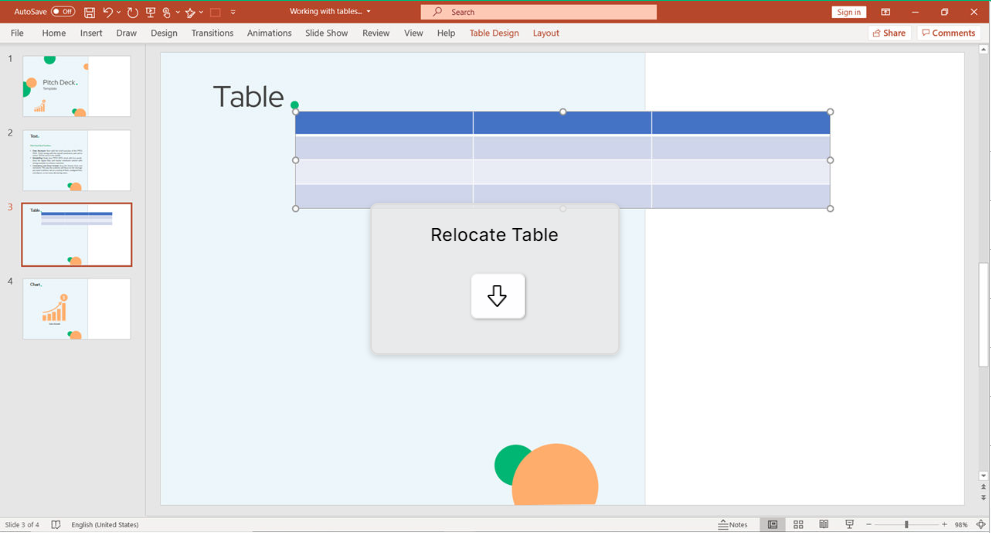
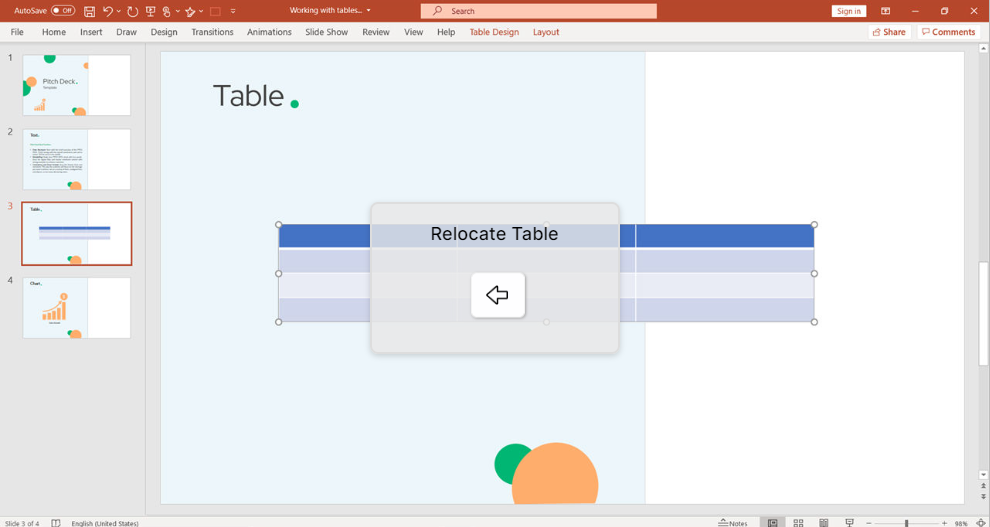
Great! You’ve got your table. However, it’s not the right position. Relocate it by using the Arrows (Down and Left).
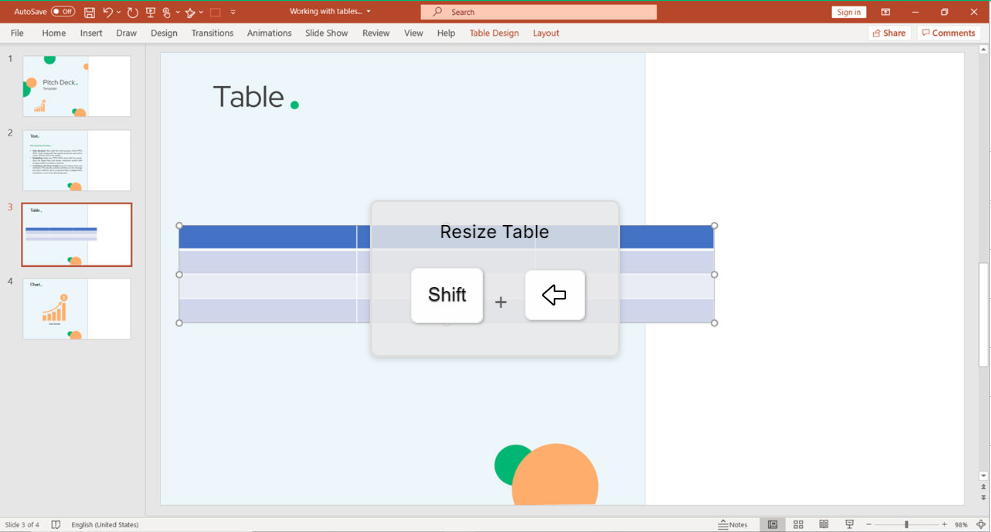
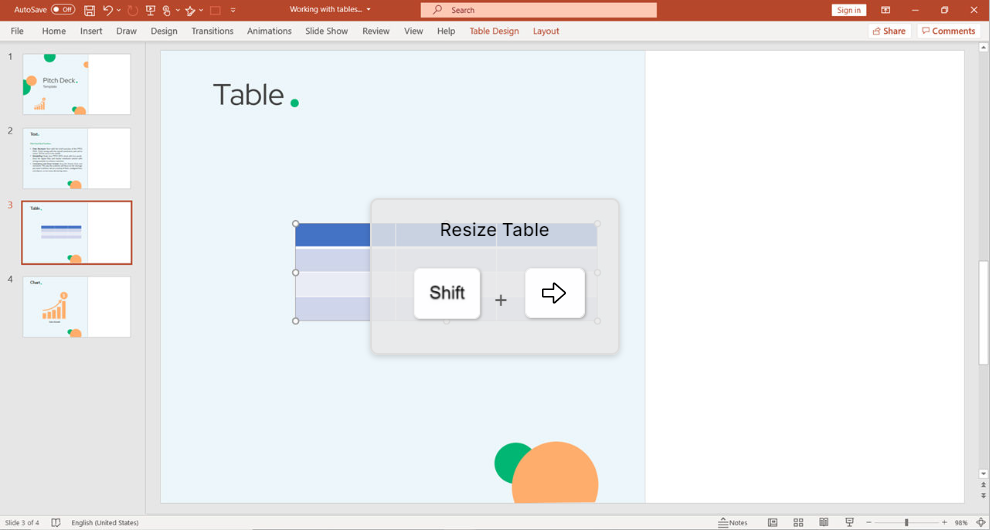
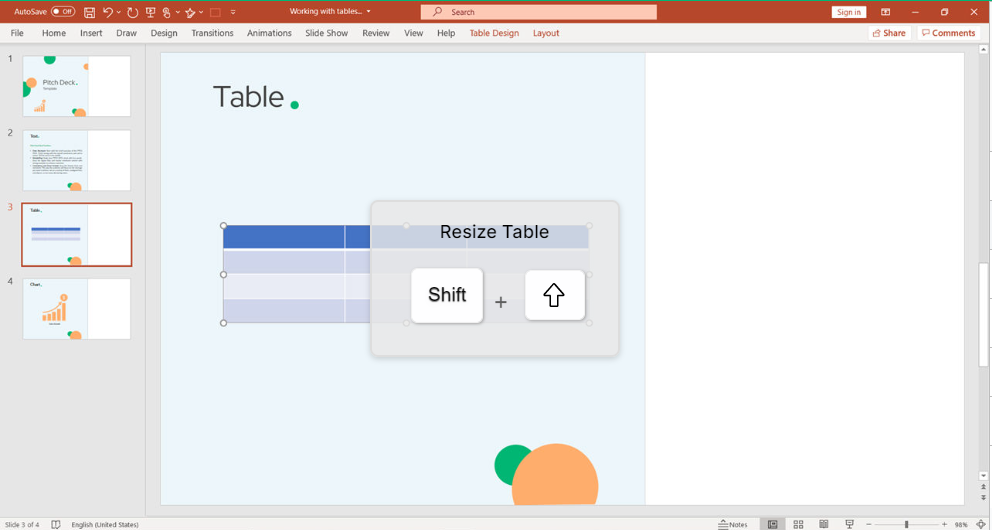
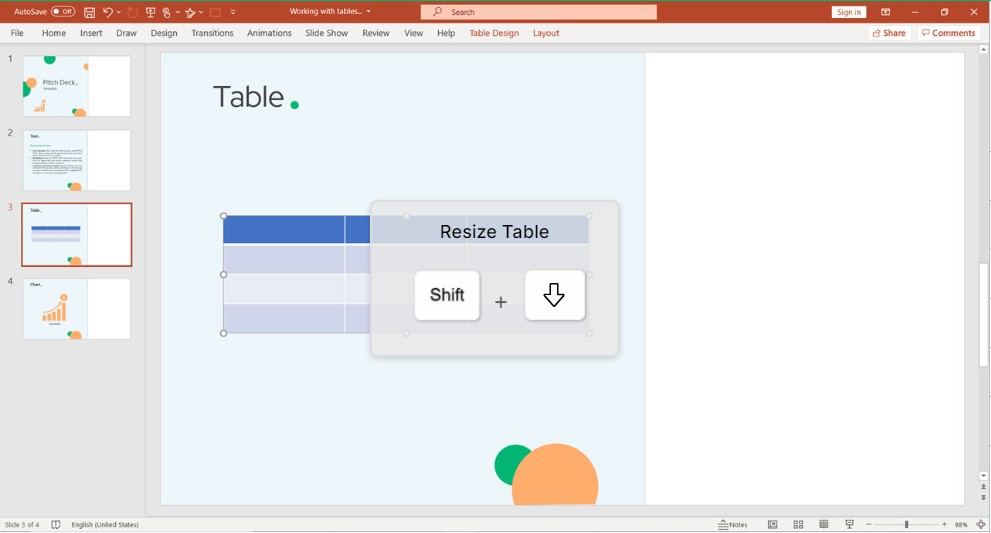
To resize the table, use Shift + Arrow (Left/Right or Up/Down).
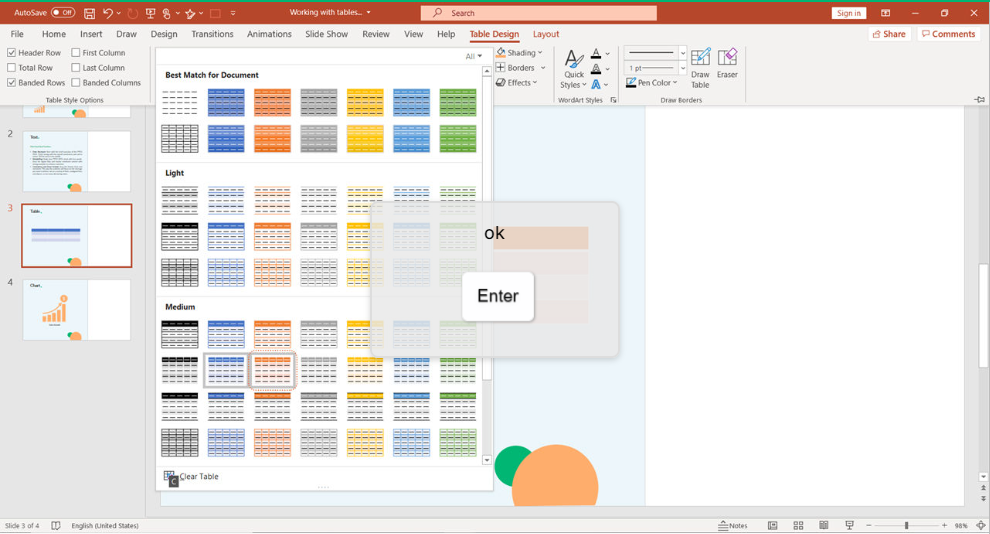
In case you want to change table layout, use Alt J T A.
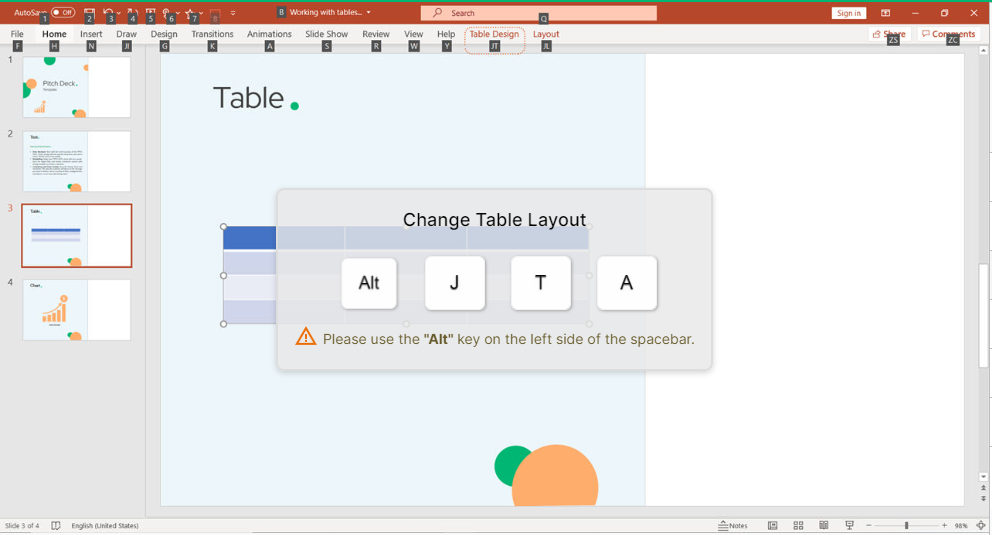
The window with different colors and layouts will pop up. Navigate by using the Arrows and once you select the desired one, click Enter.
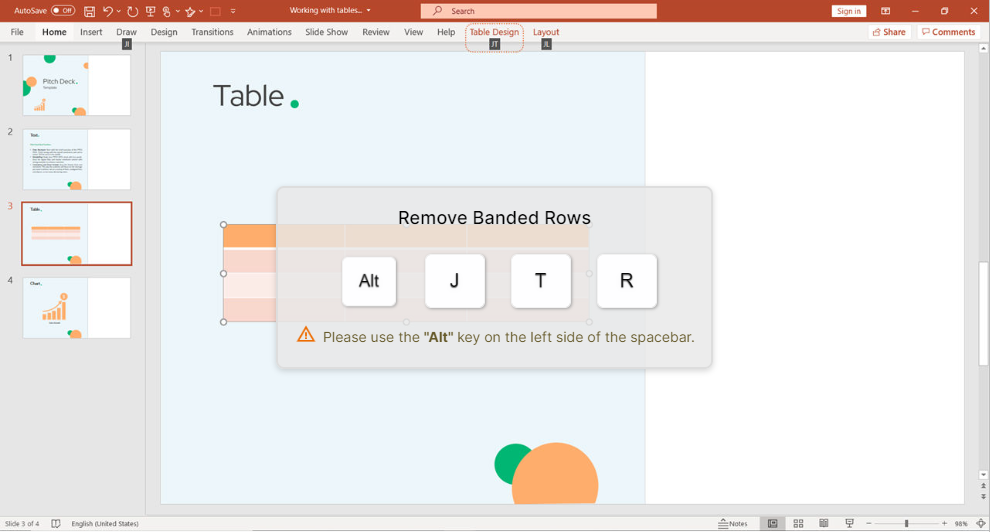
Remove the banded rows with an easy shortcut Alt J T R.
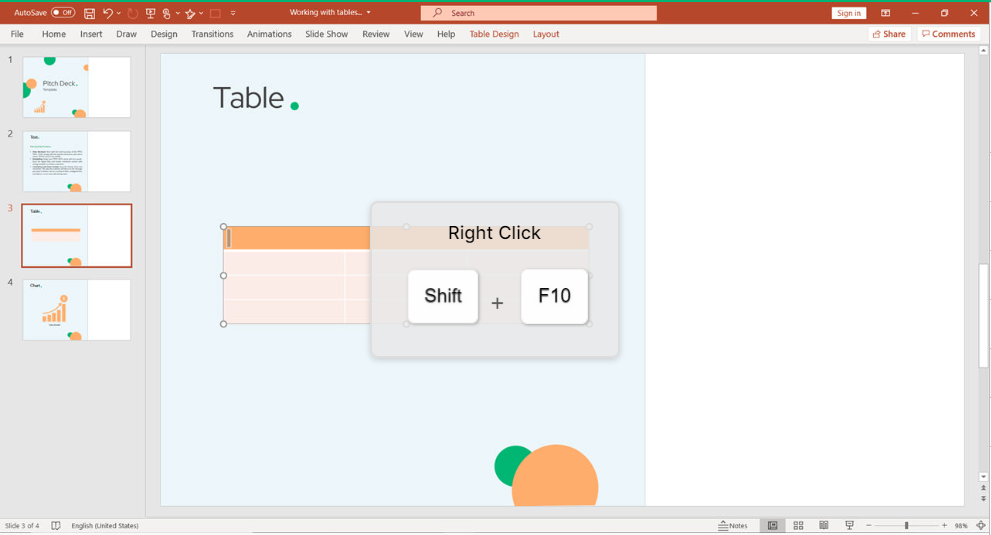
If you want to work with particular columns, you need to use Shift + Arrow (Right). It will select the columns you need.

Once you selected the columns, right click with Shift +F10.

You will have a few options to choose from. But in our case, we want to merge the cells. M shortcut is the right one to use, then click Enter.


In case, you want to reverse the action and split the cells, open the options window (Shift + F10) and press E. Then, Enter.

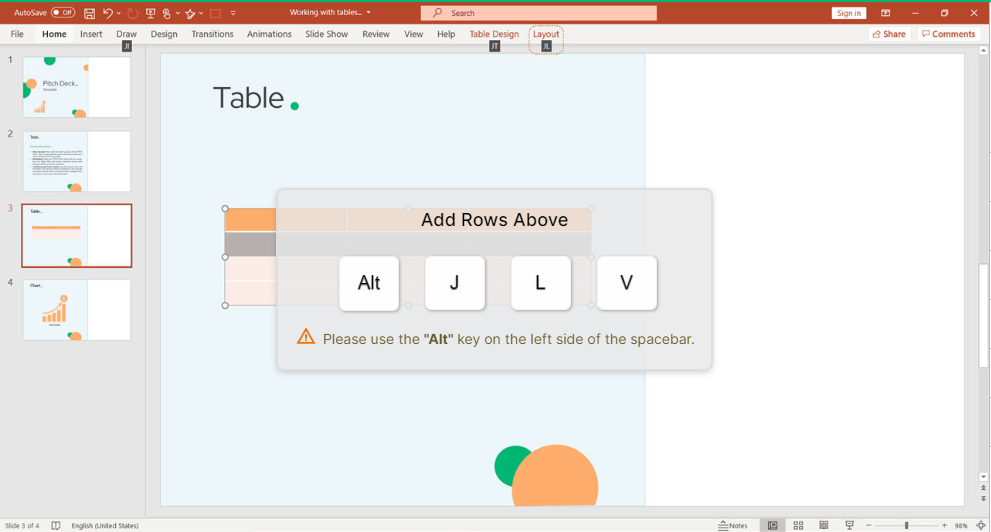
Another useful trick is to add rows above. You can do that faster by using Alt J L V.
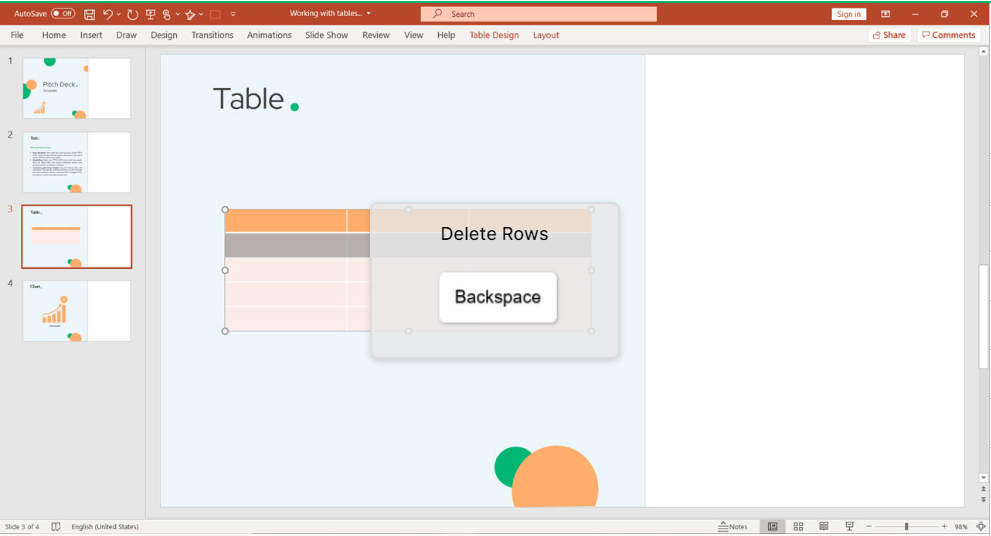
To delete the rows, press Backspace.
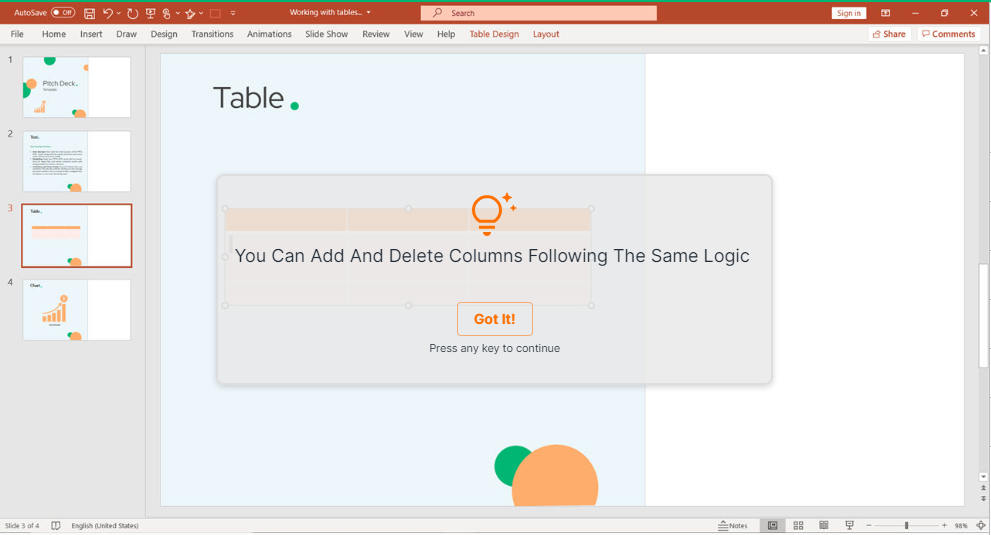
The same logic applies when you want to add/remove columns.
Highlight cells down by pressing Shift + Arrow (Down).

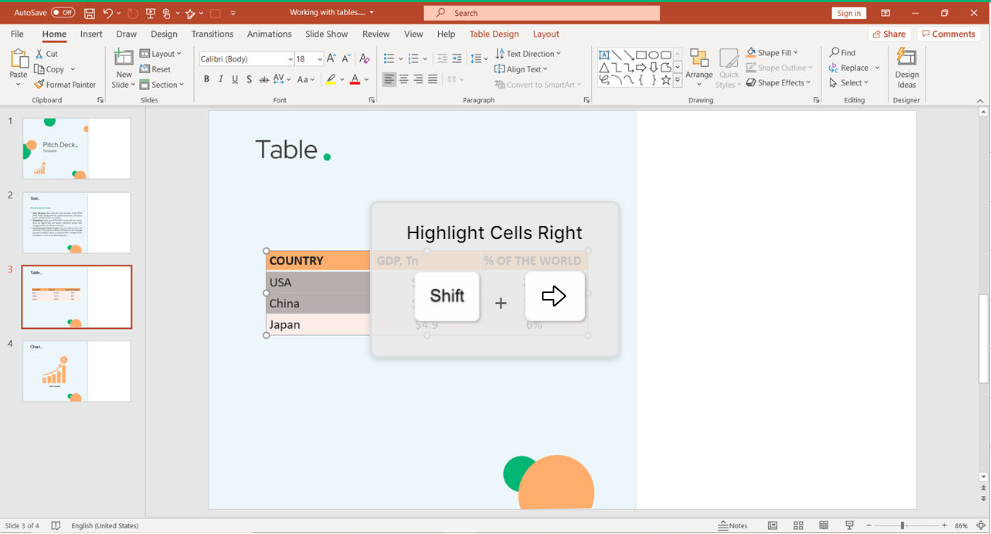
Otherwise, if you want to highlight cells right, click Shift + Arrow (Right).
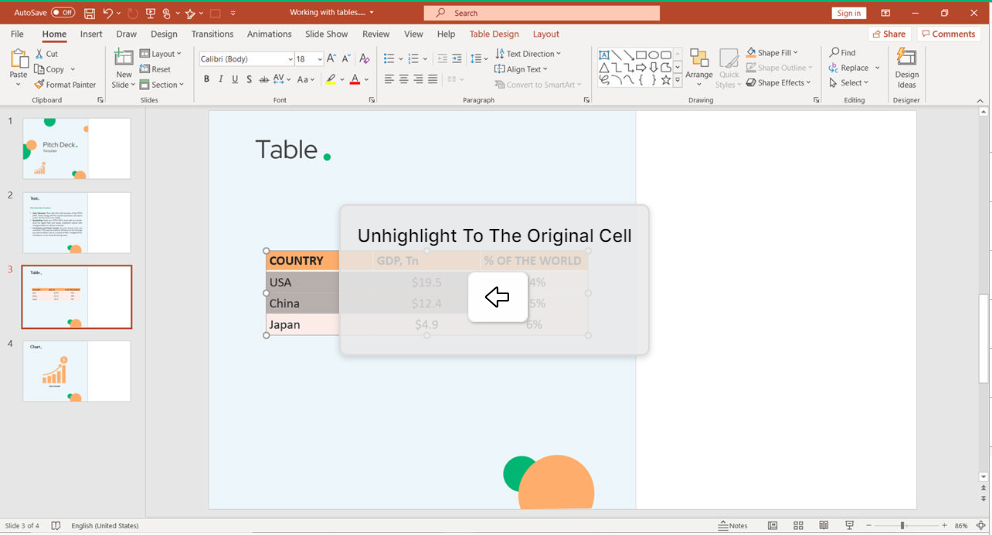
If you want to un-highlight to the original cell, just use Arrow Left.
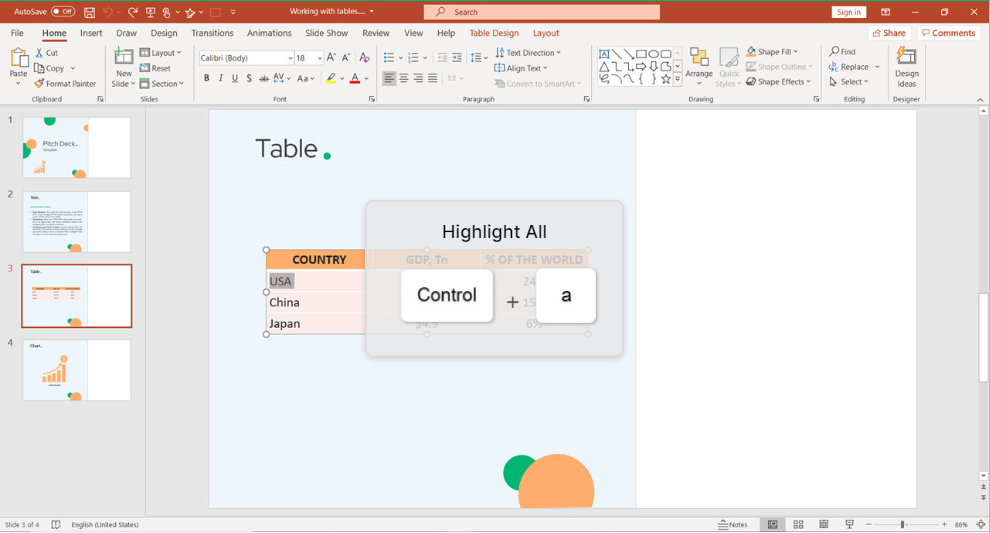
A quick and easy tip to highlight the whole table is with Ctrl + A.
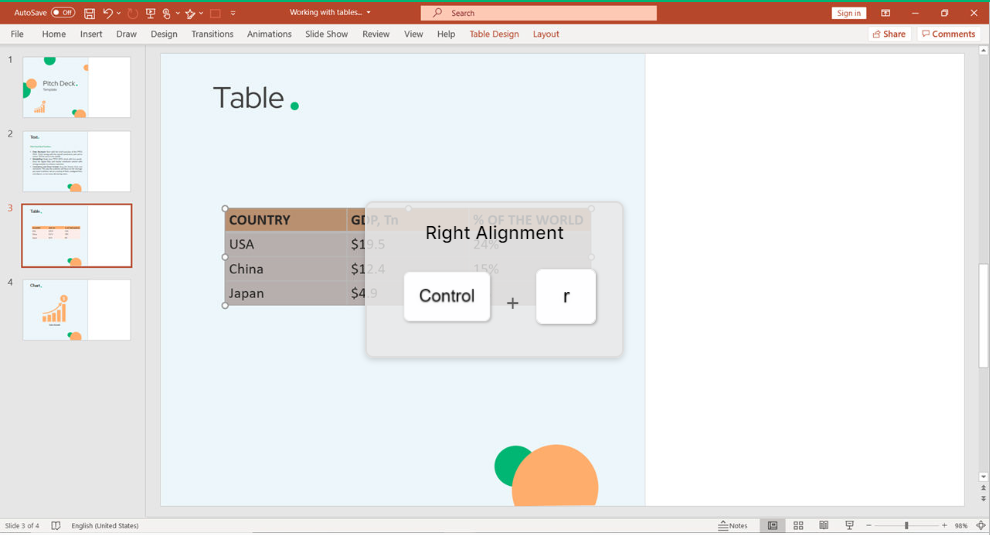
When you need to adjust the position of your text in the table, it’s easier to use the shortcuts for alignment. For example, for the Right alignment, use Ctrl + R.
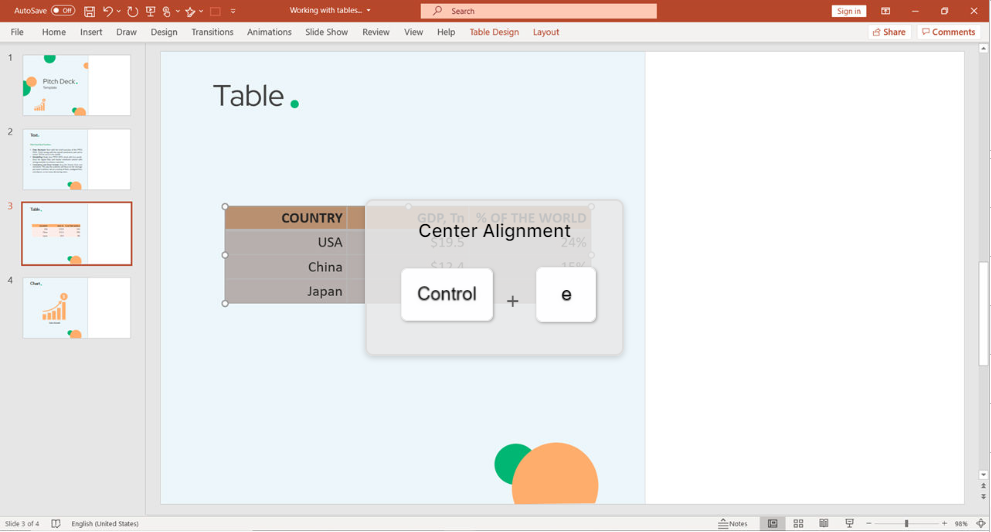
To align the text in the center, click Ctrl + E.
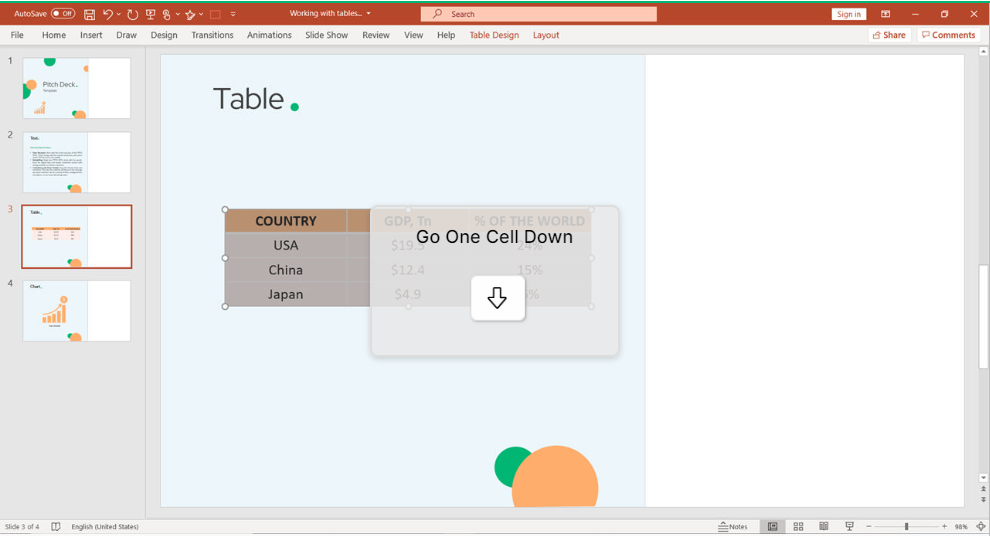
You can go one cell down by clicking on Arrow Down.
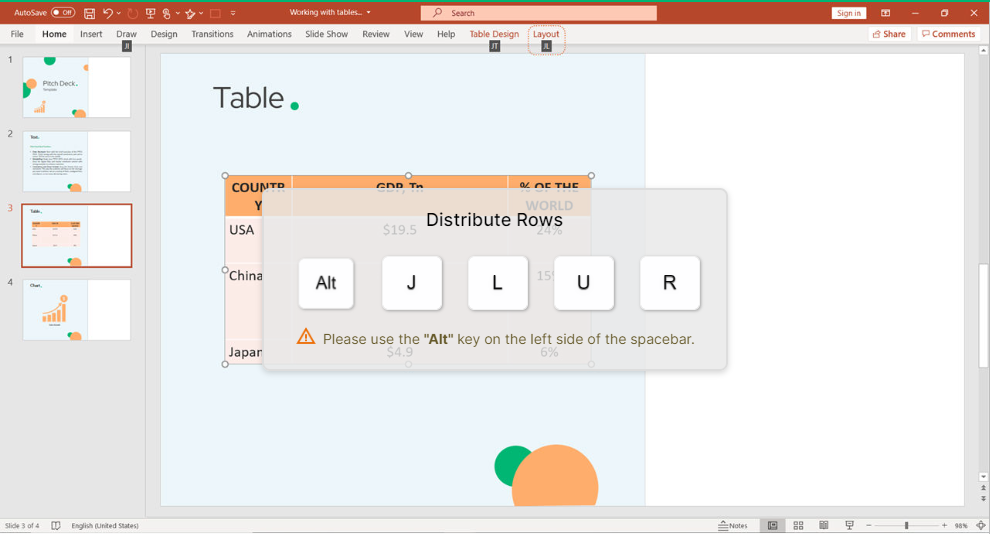
When you want to distribute rows, use Alt J L U R.
In case of columns, click on Alt J L U C.

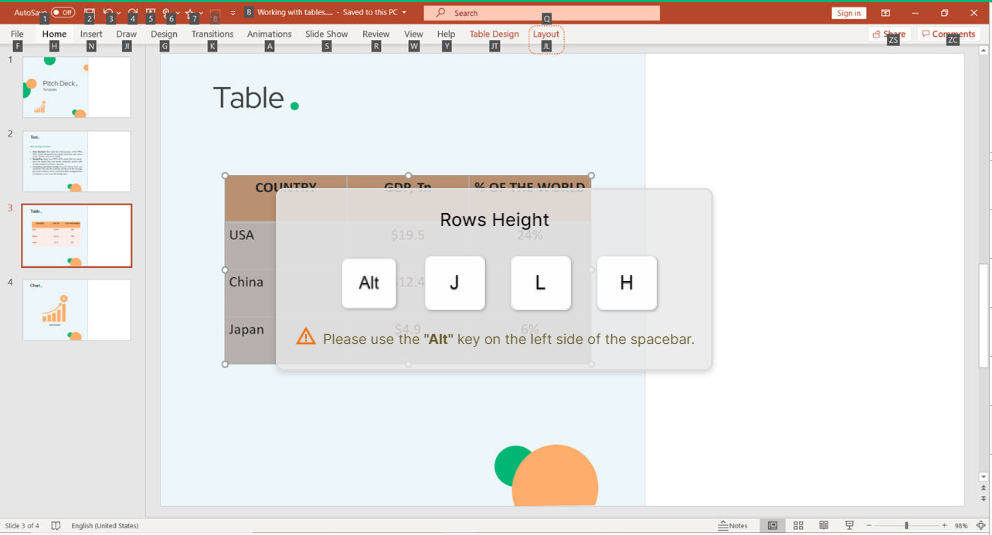
In PowerPoint, you can experiment with the height of the rows. Just use the Alt J L H shortcut and the job is done.
If you are not happy with the height, you can always adjust it by using 0 A.
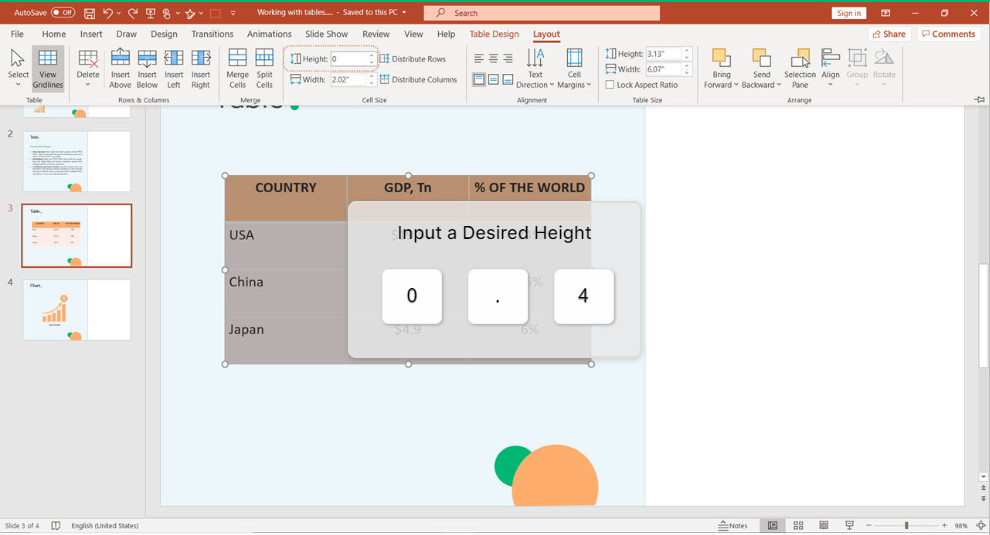
Press Enter to confirm your choice.


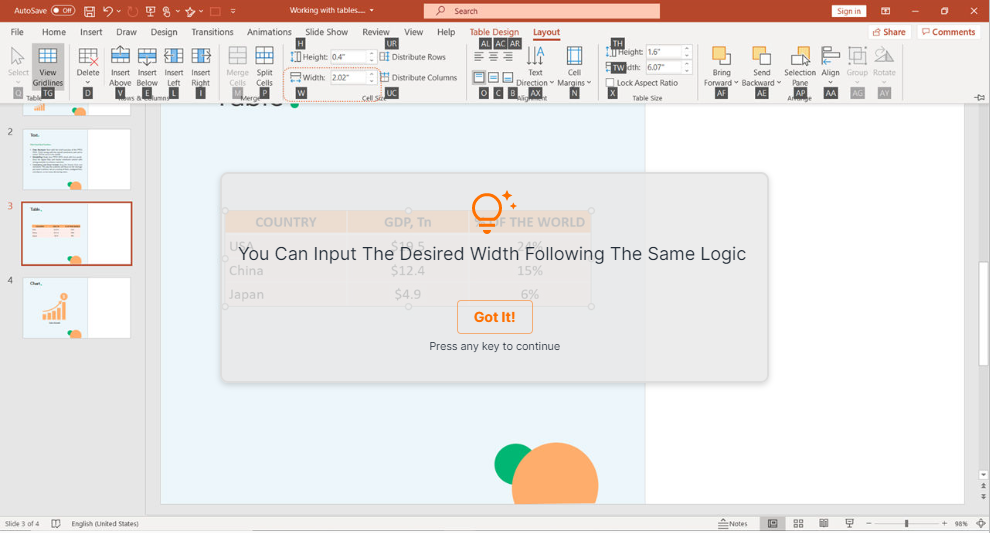
The same logic applies when you wan to regulate the width.
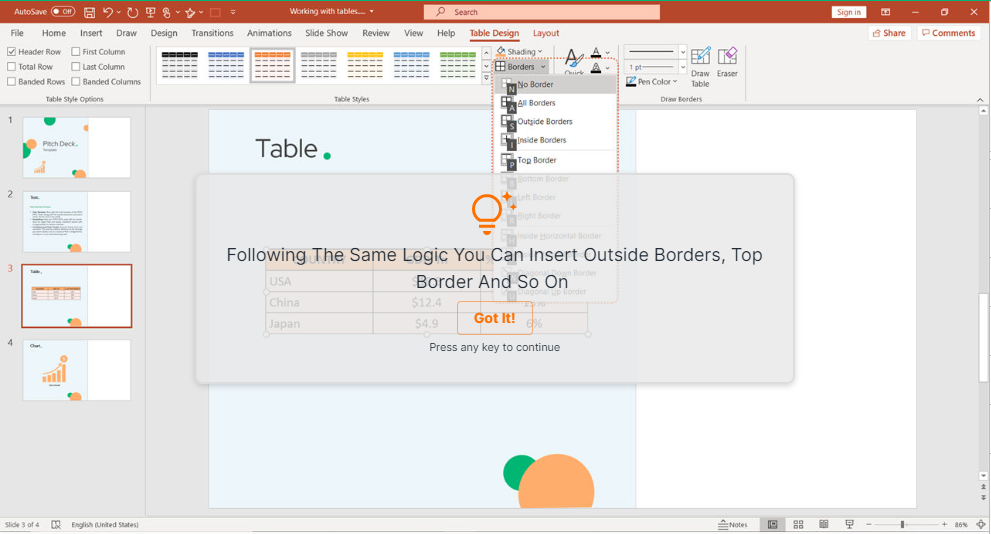
Insert all borders by clicking on Alt J T B A.
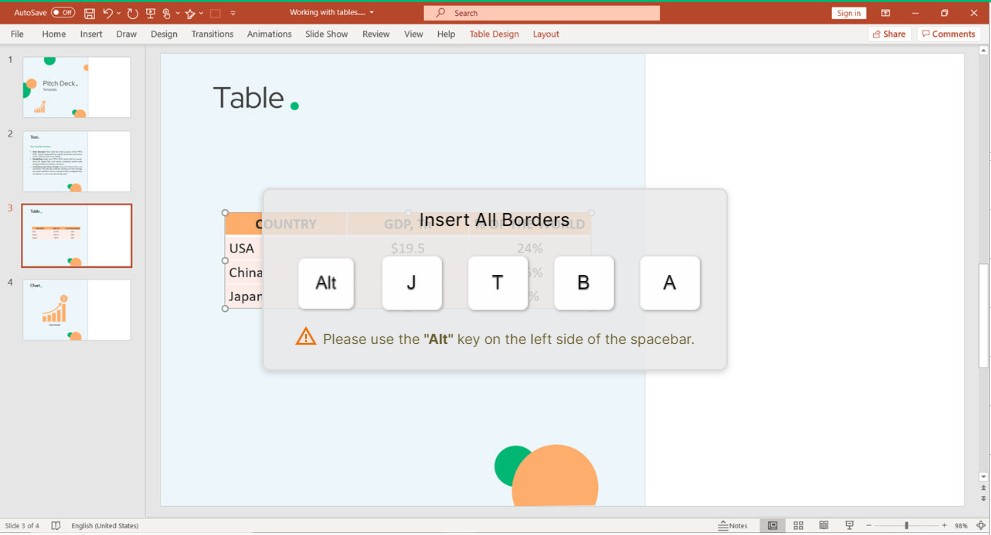
The same logic applies when you want to insert outside borders.
Conclusion
Keyboard shortcuts are the easiest way to do things faster. However, with a wide variety of software, it’s hard to remember all the different shortcuts. Even though we all know they are useful, few of us bother using them. keySkillset is happy to provide the best solution on the market to build muscle memory when creating tables in PowerPoint.
.jpg)
.jpg)

.jpg)
.jpg)


.png)

